Are Your Model Aircraft Kits Missing That Spark? Detail like a pro, impress like a master, and unlock the secrets of model aircraft mastery. Discover the art of detailing that transforms simple kits into stunning replicas: from beginner’s basics to advanced techniques, this guide is your ticket to pro-level craftsmanship!
Welcome to the intricate world of model aircraft detailing – an art that transforms simple kits into stunning replicas of real aircraft. Detailing your model aircraft is an essential process. Much more than just aesthetics, detailing is what adds authenticity and depth to your creation.
Understanding the Basics of Aircraft Detailing
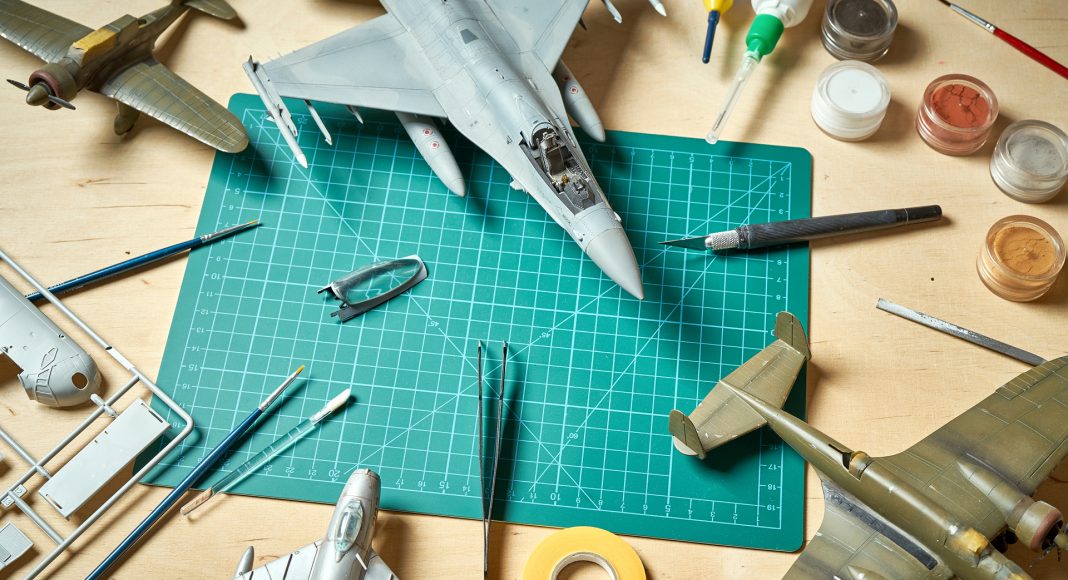
Before you dive into the intricate world of aircraft detailing, it’s important to have the right tools and materials at hand and to set up a workspace that encourages precision and creativity.
Tools and Materials Needed
- Airbrush and Compressor: Essential for applying smooth and even layers of paint, an airbrush is essential for professional-level detailing. The compressor should be reliable and provide consistent air pressure.
- Fine Detail Brushes: A selection of fine-tipped brushes is essential for painting fine details not possible with an airbrush.
Tweezers and clamps: For handling and placing small decals and parts without smudging or misplacing them. - Modeling Putty and Sandpaper: For filling gaps and smoothing surfaces to give your model a perfect finish before painting.
- Decals and Sealants: High-quality decals add authenticity, while sealants protect your painstaking work from dust and damage.
- Glass: Magnifying glass can be a game changer for painting and assembling tiny components with precision.
Each tool and material serves a specific purpose, enhancing the quality of detail and bringing your model closer to reality.
Setting up your work area
Creating an optimal environment for detailing is just as important as having the right tools. Here are some tips to keep in mind:
- Adequate lighting: Make sure your work area is well-lit with daylight bulbs to mimic natural light, which will help you see any inconsistencies in your paint job.
- Organized space: Keep your tools and materials within easy reach, but organized. Use holders for brushes and airbrushes, and organizers for your paints and small parts.
- Clean and dust-free area: Clean your work area regularly to prevent dust from sticking to wet paint and ruining the surface of your model.
- Comfortable Seating: Since detailing can take hours, a comfortable chair that supports your back is essential.
A well-organized and equipped work area will not only increase efficiency but also the enjoyment and quality of your model detailing projects.
Surface Preparation Techniques
Proper surface preparation is a critical first step in the model aircraft detailing process. It ensures that subsequent paint and detailing will adhere well and look pristine. Here we’ll walk you through the essential steps of cleaning and priming, followed by sanding and smoothing your model for a flawless finish.
Cleaning and Priming
- Gather your materials: You will need microfiber cloths, mild detergent, a soft brush, primer, and rubbing alcohol.
- Clean the surface: Begin by gently cleaning the model with a soft brush to remove loose particles. Next, mix a mild detergent with warm water. Using a microfiber cloth, wash the model thoroughly but gently to avoid damaging small parts or details. Rinse with clean water and dry with another microfiber cloth.
- Degrease the surface: Dampen a clean cloth with rubbing alcohol and wipe the model to remove any oily residue left by soap and water. This step is critical for a primer to adhere properly.
- Apply primer: Select a primer that is compatible with the model’s material (plastic, resin, metal). Spray an even, light coat of primer over the model. It’s best to do this in a well-ventilated area or spray booth. Allow the primer to dry according to the manufacturer’s recommendations, usually about 24 hours.
Sanding and Smoothing
- Select the proper grit: Start with a medium-grit sandpaper (approximately 200-300) for initial smoothing. This will remove any prominent imperfections or mold lines.
- Refine the surface: Switch to a finer grit sandpaper (400-600) to smooth out the scratches from the coarser sandpaper. Sand gently in circular motions to achieve a smooth surface.
- Final touches: For areas that require an ultra-smooth finish, especially where high-gloss finishes will be applied, finish with an even finer grit (800-1000).
- Clean again: When sanding is complete, wipe the model with a damp cloth to remove all sanding dust. Allow the model to dry completely before painting.
These preparation steps are essential for any modeler who wants to achieve professional results with their aircraft models. Each step, from washing to sanding, contributes significantly to the overall quality of the finished piece.
Advanced Painting Techniques
Mastering the art of painting your model aircraft not only enhances its visual appeal but also adds a satisfying level of realism to your creation. This section takes an in-depth look at the tools and techniques that will enhance your painting skills, focusing on airbrushing and hand-painting fine details.
Airbrushing Skills
Airbrushing is a fundamental skill for any serious model aircraft hobbyist. It allows for a smooth application of paint, ideal for creating gradients and subtle color shifts that mimic the wear and tear on real aircraft.
- Choose the right airbrush: Start with a dual-action airbrush that gives you control over both airflow and paint volume. This feature is critical when working on models where precision is essential.
- Prepare your paint: Dilute your paint to the consistency of skim milk. This will prevent clogging and ensure smooth flow. Use a specific thinner of the same brand as your paint to avoid adverse reactions.
- Practice your technique: Start by practicing on a spare piece of plastic to get a feel for the airbrush. Set the pressure on your compressor to about 15-20 psi for fine details. Practice making lines, dots, and gradients until you feel confident.
- Apply paint to your model: Start with light coats and gradually build up the color density. Use masking tape to protect parts of the model that require sharp paint edges. For gradients, start with the lighter color and smoothly transition to the darker shades by gradually reducing the flow of paint as you move the airbrush away from the surface.
Hand-Painting Fine Details
Hand painting is a good choice for adding fine details such as cockpit instruments, insignia, and other small details. Airbrushing, on the other hand, is perfect for large areas and gradients.
- Brush Selection: Experts usually prefer fine-tipped synthetic brushes for acrylics, while sable brushes are the best choice for enamel.
- Mix the paint: Add a few drops of water or acrylic thinner to obtain the proper consistency of your paint. The goal is to have enough flow without the paint running into unwanted areas.
- Application Technique: Dip only the tip of the brush into the paint and wipe off any excess to avoid splotches. Gently apply to desired areas with smooth hand movements. For straight lines, use a ruler or piece of tape as a guide.
- Enhance details: To make raised details stand out, add a drop of white or light gray to the base colors. Use a small brush and a steady hand to apply these highlights.
Adding Realistic Details
Decals and Markings
One of the most satisfying stages of aircraft detailing is applying the decals and markings that give your model an authentic look. To ensure that your decals adhere properly and last, first, make sure the surface is squeaky clean. Any dust or oil will prevent the decal from adhering properly. After positioning the decal, use a decal setting solution to soften the decal so it fits snugly into crevices and over contours, reducing the risk of peeling.
It’s important to seal your decals for longevity. After drying, brush a thin coat of clear varnish over the decal to protect it from physical damage and fading. This also helps the decal blend into the paint, minimizing the “sticker look” that can detract from realism.
Weathering for Realism
Weathering is a technique used to replicate the effects of wear and tear on aircraft, adding a layer of realism that can make your model stand out. Begin with light sanding with fine sandpaper to create areas of wear, especially on high-contact areas such as wing edges and around the cockpit. Techniques such as dry brushing with a lighter shade of base paint can accentuate raised details and simulate faded paint from sun exposure.
For more advanced weathering, consider adding rust or oil streaks. Use diluted paint or special weathering pastels to apply streaks that flow back from panel lines and rivets, mimicking the effect of rain washing dirt and oil over the aircraft. Any additions should be subtle; the goal is to suggest age, not to overwhelm the model’s appearance.
Custom Modifications
When you want to take your model aircraft from standard to extraordinary, custom modifications can make all the difference. These techniques not only add authenticity, but also allow you to inject your own personal creativity into any project.
Scratch Building Parts
Scratch building is the art of creating parts from raw materials to add unique elements to your model that aren’t available in standard kits. Start by identifying the parts you need to replicate or invent. Materials such as plastic card, resin, or even household items can be sculpted to fit your vision. For precise cuts and shapes, you can use tools such as craft knives, files, and sandpaper.
To get started, draw a detailed plan of the part on paper or a digital tool to use as a blueprint. Measure the dimensions on your model and scale your drawings accordingly, then cut your material from this plan and carefully shape it with your tools. Attention to detail makes all the difference; it ensures that the part not only fits well, but looks like an integral part of the model. Once you have built the part, paint and finish it to match the overall aesthetic of your aircraft. This attention to detail adds a sense of authenticity and uniqueness to your model.
Kit Bashing
Kit-bashing is a creative whirlwind in the modeling world that involves combining parts from different model kits to create something entirely new. This method is perfect for modelers who want to break the mold and create something beyond the limitations of a single kit.
Start by envisioning the design of your aircraft or choosing a theme or perhaps an era for inspiration. Now, gather a variety of kits and spread out their components. Look for parts that might complement your design, even if they weren’t originally intended for an airplane. Maybe a part from a car model becomes a futuristic jet engine, or a turret from a battleship becomes a bulky cockpit. The key is to keep an open mind and constantly test how the pieces fit together.
Once you’re happy with your design, it’s time to glue the pieces together with modeling glue or epoxy. Finish by smoothing out any rough edges where the pieces meet for a seamless look, then paint and weatherize your creation to bring your visionary aircraft to life.
These customization techniques not only enhance the model’s display value, but also challenge your skills and creativity, pushing the boundaries of conventional model aircraft building.
Finishing Touches
Once you’ve meticulously detailed your model aircraft, the last step is to protect and display your masterpiece. This section covers essential practices for sealing and protecting your work, as well as innovative ways to display it effectively.
Sealing and Protecting
After spending hours or even days applying intricate details to your model aircraft, the last thing you want is for your hard work to be damaged by handling or environmental factors. Sealing your model is critical. A good sealant will not only protect your paint and decals from chipping, it will also enhance the overall appearance by providing a uniform finish – matte, satin or gloss, depending on your preference.
A matte or satin finish is often a more realistic option for models that mimic real aircraft, especially military aircraft where reflective surfaces must be avoided. Products such as Testors Dullcote or Vallejo Matte Varnish are excellent choices for a non-gloss finish. If your model is a commercial airliner, a gloss finish may be more appropriate to replicate the shiny surfaces found on these aircraft. Future Floor Polish (acrylic-based) is a popular choice for its smooth and durable gloss finish.
When applying sealers, make sure the model is free of dust. Apply light, even coats to avoid flooding detailed areas. Allow each coat to dry completely before applying the next coat to ensure a protective layer that won’t obscure details.
Displaying your model
Displaying your model is almost as important as building it. A good display not only shows off the detail, but also tells a story. Consider mounting your model on a base that represents an environment relevant to the aircraft’s history, such as an airstrip, hangar, or even a diorama depicting a historical event.
Using a clear acrylic case can protect your model from dust and damage, while allowing for unobstructed viewing from all angles. Lighting also plays an important role; position lights to accentuate the colors and shadows of the aircraft’s features. LED strips can be a great way to highlight specific aspects such as custom decals or weathering effects.
Finally, labeling your model with a small plaque stating the aircraft type, scale, and perhaps a bit about its history or significance can add a professional touch that enhances the viewing experience.
Troubleshooting Common Detailing Challenges
Even the most meticulous modeler can run into problems during the detailing process. Here are some common problems you may encounter and how to effectively fix them:
Peeling or Chipping Paint
One of the most frustrating problems is when your meticulously applied paint starts to peel or chip. This is often because of a poorly prepared surface. To prevent this, make sure the model surface is thoroughly cleaned and primed before painting. If peeling occurs, gently sand the affected area, apply a thin coat of primer, and repaint. Always allow adequate drying time between coats.
Decal Silvering
Silvering occurs when air becomes trapped under decals, creating a shiny appearance that ruins the realism of your model. To correct this problem, use a fine needle to make small holes in the decal and apply a decal softener. This will allow the softener to penetrate and adhere the decal to the surface. For future applications, make sure the surface is glossy before applying decals to reduce the risk of air pockets.
Fingerprints on the Finish
Accidentally touching a model during painting can leave unsightly fingerprints. While the paint is still wet, use a fine brush dipped in thinner to lightly brush over the mark. When the paint is dry, you’ll need to lightly sand the area and reapply the top coat. To avoid this, always handle the model at the edges or wear gloves.
Clogged Airbrush
During detailed airbrushing, paint can dry in the nozzle and cause a clog. To clear a clog, disassemble the airbrush, soak the nozzle in a cleaning solution, and use a soft brush to remove any paint residue. You can prevent clogs by cleaning your airbrush regularly and adding a few drops of thinner to your paint mix to improve flow.
Sticky Resin Parts
Sometimes resin parts remain tacky after painting. This usually means the paint hasn’t cured properly, often due to humidity. You can fix this, too. Increase the drying time, and if the tackiness persists, apply a clearcoat over the paint, which can help seal and protect the finish.
Every challenge in model aircraft detailing is an opportunity to hone your skills. Remember, patience and practice are your best tools for achieving professional results. Connect with other enthusiasts in forums or on social media to share your experiences and solutions to these common problems!
Conclusion
As we conclude this brief exploration of professional aircraft detailing techniques, we hope you feel equipped and inspired to enhance your modeling projects.
From meticulous surface preparation to the artistic finesse of airbrushing and hand-painting, each step is designed to enhance the realism and aesthetic appeal of your models. We’ve also touched on advanced skills like scratch building and kit bashing, which open the door to truly unique creations.
Now, it’s your turn to put these techniques into practice and see how they transform your models.


