Stop ruining paint jobs. This step-by-step guide hands every beginner the exact tools, prep, and pro techniques needed to finish a model airplane that looks sharp — and to fix it when things go sideways.
Why Your First Paint Job Matters More Than You Think
You glued the last seam, the fuselage looks great, and you can’t wait to see your model in its colors. Then the first brush coat dries with ridges, the second coat swallows the panel lines, the masking tape peels paint back to bare plastic, and the decals turn cloudy over flat paint. If that scene sounds familiar, you are not short on talent — you are short on sequence.
That is the heart of model airplane painting for beginners: the paint stage is where every earlier decision shows up. Painting does not simply add color; it broadcasts every choice you made before the first coat, from seam cleanup to dust control to decal surface prep. As FineScale Modeler put it, “Solid, clean construction makes a scale model accurate. Finishing, in everything from paint to decals, is what makes that model come alive” (FineScale Modeler, “Build great scale models, Part 4”). The reference books we leaned on say the same thing more bluntly: the top surface of the paint reflects what is underneath, so deep scratches, gaps, lumps, and bumps show up rather than disappear under a coat.
It is genuinely hard for newcomers because painting an aircraft model is not one craft but several stacked together: surface preparation, masking, paint chemistry, application control, curing time, decal chemistry, clear coats, and restrained weathering. Miss the order and the model fights you at every step.
Here is our promise. By the end of this guide you will know what to buy, how to clean and prime, how to lay down paint with a brush or a spray can, how to gloss before decals, how to seal and lightly weather, and how to recover when something goes wrong — none of it requiring an airbrush. The advice reflects habits validated across countless builds and confirmed by manufacturer instructions and tier-one hobby sources, because the first paint job is not a test of talent; it is a test of process.
What You Need Before You Open a Single Paint Jar
The most common beginner mistake happens before any paint is mixed: starting unprepared. Here is exactly what to understand and gather first.
Paint Types Explained — Without the Jargon
Three paint families show up on hobby-shop shelves, and you do not need a chemistry degree to choose well.
Acrylics are the beginner’s first family — Tamiya acrylics, Vallejo Model Air or Model Color, and Mr. Hobby Aqueous. FineScale Modeler notes that modern acrylic modeling paints are tougher and more reliable than early versions, and that their greatest advantages are “water cleanup — no turpentine, lacquer thinner, or mineral spirits — and no irritating, solvent-based fumes” (FineScale Modeler). Easier cleanup and less solvent odor make acrylics the friendliest starting point.
Lacquers are high-performing but less forgiving for newcomers because they need stronger solvents and real ventilation. Tamiya USA says of its TS line, “These cans of spray paint are extremely useful for painting large surfaces. The paint is a synthetic lacquer that cures in a short period of time,” and describes its AS sprays as synthetic lacquer colors developed specifically for aircraft models (Tamiya USA). Mr. Color is another lacquer line for durable airbrushed finishes (GSI Creos).
Enamels such as Humbrol and the legacy Testors Model Master line still matter, mostly because enamel and oil washes remain popular for weathering. FineScale Modeler notes many modelers still like enamels for toughness and adhesion (FineScale Modeler).
Beginner’s Pick: Why Most Experts Start With Acrylics
Water cleanup, no harsh solvent fumes, and easy brush or rattle-can workflow make acrylics the safest on-ramp. You can always add lacquer spray cans and enamel washes as your skills grow.
Two compatibility rules save you grief. First, different hobby paint types have different chemical compositions and, as the source books warn, “cannot be mixed” — use the manufacturer’s own thinner or the one it recommends. Second, never apply an enamel or oil wash directly over an uncured or unprotected enamel base coat, because the wash solvent can disturb the paint underneath; seal first with a clear gloss (FineScale Modeler forum).
Brushes vs. Rattle Cans vs. Airbrush — Choosing Your Weapon
Brush painting is accessible, inexpensive, and stays useful even for modelers who own airbrushes, because cockpits, wheel wells, tires, hubs, switches, prop tips, exhausts, and small antennas are often best handled by a fine brush. FineScale Modeler recommends keeping at least one medium-point brush and one fine-point brush, working from a palette rather than the bottle, moistening the bristles with thinner, testing the flow, and minimizing strokes so the paint can level without leaving brush marks (FineScale Modeler).
Rattle cans are the most pragmatic entry point for large-area base coats — no airbrush cost or setup, and a smoother broad finish than most first brush jobs. Tamiya’s AS aircraft sprays are “specifically developed for finishing aircraft models” and come in 100 ml cans (Tamiya USA). One firm warning: TS and AS sprays are synthetic lacquer, so work outdoors or in a spray booth, ventilate, and wear a respirator suited to organic vapors rather than treating them like water-based craft paint.
The airbrush is the gold standard for camouflage, subtle shading, exhaust staining, and controlled thin coats. The IPMS camouflage guide calls a good-quality airbrush the most important tool for soft-edge patterns (IPMS McKinstry). But it is not required for your first build, and nobody should shame you for not owning one.
The forgiving beginner route: a rattle-can primer and/or single-color base coat, then hand-painted cockpit, landing gear, wheels, exhausts, propeller tips, and detail parts. That follows Tamiya’s own logic — sprays cover the large surfaces, and details get picked out afterward with enamel and/or acrylic paints (Tamiya USA).
The Essential Toolkit (Quick-Reference Checklist)
- Brushes: a No. 0 and a No. 2 fine/round brush, plus a medium-point brush (FineScale Modeler)
- Primer: Tamiya Fine Surface Primer in light gray or white. Tamiya says it is “ideal for preparing your plastic model parts made of ABS and Styrene plastic for paint,” can be used on metal, and that “both primers bite well into plastic surfaces and even fill in small scratches and imperfections” (Tamiya USA)
- Optional primer upgrade: Surfacer 1000 or 1200, listed in the GSI Creos surfacer/primer category (GSI Creos)
- Masking tape: Tamiya Masking Tape — “thin, very strong adhesive tape for modeling use. It even adheres well to uneven surfaces. It’s ideal when sharp and crisp lines are required”; the 10 mm roll is 18 m long (Tamiya USA)
- Sanding sticks: roughly 400–1000 grit for seam cleanup and surface prep; 3000–12000 grit pads for post-paint polishing
- Decal chemistry: Micro Set and Micro Sol (Microscale Industries)
- Clear coats: a gloss clear for decals and washes, plus a flat or satin clear for the final finish
- Wash thinner: odorless mineral spirits or odorless Turpenoid for oil/enamel washes
- Small consumables: cotton swabs, paper towels, small glass or plastic mixing jars, pipettes or stir sticks, toothpicks, a soft toothbrush, dish soap, a tack cloth, and a cardboard or alligator-clip handle to hold the model
- Safety: a paint respirator and a ventilated workspace, especially for aerosols, lacquers, and solvent washes
A safety note worth repeating: FineScale Modeler tells readers to ventilate and wear appropriate protection, Tamiya’s aerosol page carries a chemical-exposure warning, and Weber states that its Odorless Turpenoid is a petroleum-distillate product whose vapor may be harmful, that it is combustible, and that you should “use only with adequate ventilation” (Weber Art). “Odorless” does not mean safe.
Surface Prep — The Step Most Beginners Skip (and Regret)
Why Priming Is Non-Negotiable
Primer does two jobs: it creates a uniform, paint-ready surface and reveals flaws before the color coat locks them in. FineScale Modeler says primer provides a receptive, consistent base, helps when a model combines different colors of plastic, photoetched metal, or resin, reduces coverage problems for white, yellow, or red, and — crucially — “has the additional advantage of revealing construction flaws — gaps or seams — before any finish coats are applied” (FineScale Modeler). The source books make it a rule: all plastic surfaces should receive a primer coat before finish coats, with specific metalizer exceptions, and the primer acts as a final detector for cracks, imperfections, and scratches.
Tamiya Fine Surface Primer suits beginners because it bites into plastic, fills small scratches and imperfections, and can be wet-sanded before paint; Tamiya recommends light gray for dark colors and white for light colors (Tamiya USA). Mr. Surfacer 1000 and 1200 are valid alternatives — think of “surfacer” as primer plus a very fine filler for light scratches, not a putty substitute.
Practical tip: spray primer in light coats, not as body filler. Heavy primer buries panel lines, rivets, and fine detail; the source books warn that aerosol primers and wide-arc spraying build up paint and lose fine-scale detail when too many coats are applied or you spray too close.
Washing Off Mold Release and Handling Oils
Skip this step and you will wonder why paint refuses to stick. Plastic kits carry mold-release lubricant, and parts pick up dirt, polishing residue, and finger oil during the build — all of which must come off before primer or paint. FineScale Modeler confirms cleanup as a core adhesion step and notes a model can be wiped with Testors Plastic-Prep or a damp cloth, while cautioning that paper towels can leave little fibers on the painting surface (FineScale Modeler).
Here is the wash routine from the source material:
- Remove parts or major subassemblies from heavy sanding dust.
- Scrub gently with a soft toothbrush under warm water with a drop of dish soap.
- Rinse thoroughly so no soap residue remains.
- Let the parts dry completely.
- Handle cleaned parts with clean hands, gloves, or by unpainted edges.
Resin and photoetched-metal parts need even more discipline: resin can retain casting-release residue and often has a glossy surface, and photoetch is vulnerable to paint rubbing off during handling — so primer is recommended for both. In practice, wash the plastic before major assembly if the kit feels greasy, then wash or wipe again after seam sanding and before primer — the two-stage approach that pairs FineScale Modeler’s “before and after primer” advice with the books’ warning about sanding dust and finger oils.
Seam Filling and Surface Sanding
Because the painted surface mirrors the surface beneath it, correct seams, sink marks, glue smears, deep scratches, and sanding flats before primer. A beginner-friendly workflow from the source material:
- Inspect all surfaces for gaps and imperfections, and lightly mark them with a pencil.
- Apply filler to the seam or sink mark; protect nearby panel lines with masking tape if needed.
- Remove excess filler while wet where possible.
- Sand flush with a coarser stick such as 400 grit when major leveling is required, then refine with 600 to 1000 grit. (The books list general sanding grades from about 100 to 1200 grit for shaping and prep, and 3000 to 12000 grit for polishing and buffing.)
- Restore lost panel lines only after the surface is flat.
- Clean dust from engraved detail with a short, stiff brush or soft toothbrush, then wipe or wash before primer.
Mr. Surfacer also works as a spot filler near delicate details: one technique places Mr. Surfacer 500 in a gap between a wing fillet and wing, waits about 10 minutes, and removes the excess with alcohol on a cotton swab to avoid damaging small vents by sanding.
Expect the primer coat to expose flaws — that is your first honest inspection, not a failure. For the final wipe before paint, skip the dusty paper towel: FineScale Modeler warns paper towels leave fibers, so use a damp lint-free cloth, a tack cloth used lightly, or carefully applied compressed air.
Painting Your Model Airplane — The Step-by-Step Core Process
This is the heart of the build. Take it in order.
Masking the Cockpit and Clear Parts
Mask before primer or color reaches the cockpit and clear parts. Tamiya tape is the default recommendation here precisely because it is thin, strong, suited to uneven surfaces, and “ideal when sharp and crisp lines are required” (Tamiya USA). The source books also advise masking cockpits and wheel wells painted during assembly, using soft tissue or sponge inside cockpits and sealing the edges with tape.
A beginner canopy-masking sequence:
- Wash the clear part gently; dip or polish only if the kit requires it, and let it dry under cover.
- Frame the edges with narrow strips of Tamiya tape.
- Push the tape into corners with a toothpick or cotton swab.
- Cut along frame lines with a fresh blade only if you are confident.
- Fill large glass panes with additional pieces of tape.
For framed canopies, the “triangles into corners” approach is safer: place small triangular pieces of tape into the corners of each pane, then bridge between them with straight strips. This avoids forcing one large piece to conform to compound curves.
One more thing: burnish the tape edge, not the whole model. Firm burnishing along the paint boundary prevents bleed, while overhandling fresh paint invites fingerprints or lifted paint.
The Three-Pass Spray Technique
Whether you are using a rattle can or an airbrush, the three-pass rule is the foundation of smooth, even coverage.
Pass 1 — the tack coat. Start the flow before the spray crosses the model, move steadily across, and release after it passes beyond — never start or stop on the model itself, which causes splatters. This light, slightly dry-looking coat gives the next pass something to grip and keeps paint from pooling and obscuring detail.
Pass 2 — the coverage coat. After roughly 5–10 minutes for many hobby aerosols under normal conditions, lay down a slightly wetter coat that approaches full color but does not look flooded. Treat that wait as a practical interval, not a cure rule — paint type, temperature, humidity, coat thickness, and brand instructions all change drying behavior.
Pass 3 — the even-out coat. Apply only enough to blend thin spots and unify the sheen. This is where beginners overdo it, so remember: a thin, slightly imperfect coat is far easier to fix than a run that fills your panel lines.
Mind distance and conditions. Spray with a smooth, steady motion from roughly 6–8 inches (about 15–20 cm) and test on scrap first; too close builds up paint, while too far lets the paint dry before it lands and leaves a rough surface (Mr. Surfacer aerosol guidance).
The biggest beginner mistake is rushing. Too-heavy coats cause runs, sags, and pooling around raised detail; repeated heavy coats obscure recessed panel lines and rivets; cold cans or cold models promote rough texture; and humid or cold conditions can leave clear coats chalky. Thin and patient wins every time.
Mixing and Thinning Paint for Brush Application
For brush work, FineScale Modeler’s process is the gold standard: stir the paint thoroughly, put some on a palette, keep compatible thinner nearby, moisten the bristles, test the flow, overlap strokes, avoid going back over partially dried paint, and keep strokes to a minimum so the paint can level (FineScale Modeler). With fast-drying water-based paints, the source books add a limit: make only two or three passes, because extra passes create brush marks in paint that has already started to dry.
Resist the urge to obey one magic thinning ratio. Practice for Tamiya acrylics varies widely — from around 3 parts paint to 1 part thinner for some brush work to 1:1 or thinner for airbrushing (FineScale Modeler forum; Large Scale Planes). Thin gradually, often starting with just a few drops of X-20A for brush work, until the paint flows off the brush and levels. “Skim milk” is a good cue for airbrush mixes; for brushing, aim for paint that leaves the brush smoothly without dragging and does not flood corners. Vallejo’s official guidance reinforces the point: “Apply several thin coats, avoiding any attempt to cover all surfaces with a single coat, and let it dry thoroughly between coats” (Vallejo).
Painting the Interior First — Working From the Inside Out
Aircraft models usually require painting the cockpit, instrument panel, seats, sidewalls, and wheel wells before the fuselage halves or wings are closed, because those areas become difficult or impossible to reach later. Contest-level builders confirm the sequence: an IPMS/USA Su-27 build review describes priming the cockpit first, letting primer cure 24 hours, brush-painting details with Vallejo Model Color, washing the exterior with warm water and Dawn detergent, and letting primer dry 48 hours before later paint work (IPMS/USA Reviews).
A beginner cockpit sequence from the source material:
- Paint the base interior color.
- Apply a thin dark wash into corners and around raised detail.
- Dry-brush a lightened base color over raised details.
- Paint black boxes, radios, switches, belts, buckles, and handles with a fine brush.
- Add clear gloss to instrument faces if they are visible.
The wash-and-dry-brush combination is the single best way to make a cockpit come alive with almost no skill required. Flow a thin wash into the recesses to deepen shadows, then drag a stiff flat brush with a lightened base color across the raised detail to pop the highlights.
A word on cockpit color: do not treat any one paint as the universal “U.S. WWII interior” shade. Tamiya XF-71 is Cockpit Green, commonly marketed for Imperial Japanese Navy aircraft, and XF-26 is Deep Green — neither is a dedicated U.S. Interior Green. Real U.S. WWII cockpits vary by type, manufacturer, and production period, with Interior Green, Bronze Green, Dull Dark Green, Zinc Chromate Yellow/Green, and natural metal all possible (Tamiya XF-71; Tamiya color chart). Use kit instructions and references first, then choose a close model-paint equivalent. (For a green cockpit effect, the source books document one build that airbrushed roughly 70% XF-3 plus 30% XF-26, then lightened and darkened it for depth.)
If you flow an oil wash into cockpit recesses, do it over a compatible, cured surface. Weber confirms Odorless Turpenoid is compatible with oil and alkyd colors for thinning artist oils, but also warns of fire hazard (combustibility), vapor hazards, and the need for ventilation (Weber Art).
Painting External Surfaces and Multi-Color Schemes
For your first aircraft, a single-color scheme is ideal — it lets you focus on preparation, smooth application, clear coats, decals, and light weathering without wrestling camouflage. Tamiya AS sprays are developed for aircraft models, and Tamiya says their subtle shades can be obtained by simply spraying (Tamiya USA).
A great beginner one-color subject is a late-WWII U.S. Navy aircraft in overall Glossy Sea Blue — but get the reference right. That scheme corresponds to ANA 623, and its Federal Standard match is FS 15042, not FS 15050; FS 15050 is commonly identified as “Blue Angels” blue. Federal Standard numbers are numeric references, not official color names (The World Wars; MyPerfectColor).
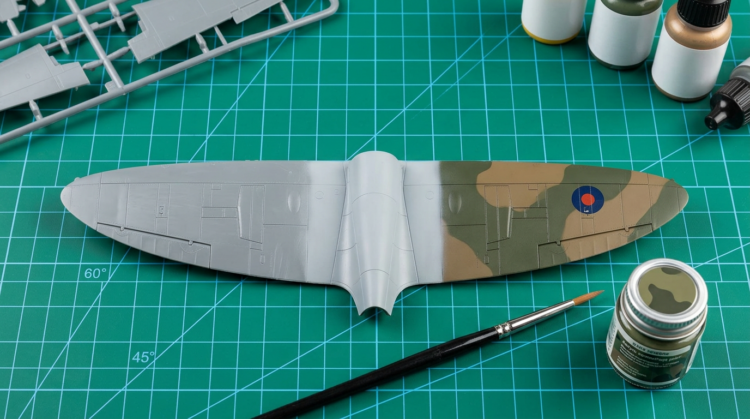
When you are ready for two colors, an RAF Dark Green and Dark Earth over Sky scheme is a friendly first camouflage. The IPMS camouflage guide describes Battle of Britain aircraft in dark earth and dark green over Sky Type S and walks through demarcation, noting that “Good references are essential in duplicating any camouflage pattern” and that “the question of a ‘soft line’ versus ‘hard line’ pattern also must be considered” (IPMS McKinstry). The sequence runs lightest color first: prime light, paint a single-color underside where applicable, draw the pattern lightly in pencil, label complicated areas, and use the lightest color to outline and fill before the next color. For demarcation, hard-edge camouflage uses Tamiya tape or paper masks sealed at the edge, while soft-edge camouflage uses slightly lifted paper masks, rolled tape, Blu-Tack, or Silly Putty sausages for a small stand-off from the surface.
One caution: even though Tamiya tape is relatively low tack, peel it off slowly — back on itself at a low angle — to avoid tearing paint back to primer, plastic, or resin. Let paint cure before you mask.
Decals — Applying Them Without Silvering or Tearing
The Golden Rule: Decals Need a Gloss Surface
Decals need a smooth gloss surface because rough or flat paint traps tiny air pockets under the clear carrier film and creates the cloudy halo modelers call silvering. As the IPMS McKinstry decal guide states, “To avoid the dreaded ‘silvering’, decals must be applied to a smooth surface so that no air gets trapped underneath” (IPMS McKinstry). Flat finishes are worse offenders because their microscopic pits hold air (FineScale Modeler forum).
So apply decals only after a cured gloss clear — Tamiya X-22, a Future/Pledge-type acrylic floor product where appropriate, or another gloss compatible with your base coat. Wait at least overnight, preferably 24 hours, before heavy decal handling unless the manufacturer says otherwise; Microscale’s instruction to let decals dry overnight before a protective coat supports that pace (Microscale Industries).
The Correct Decal Technique, Step-by-Step
Microscale’s official sequence is the strongest authority here. Micro Set is “a very versatile decal setting solution that does several things to Microscale Decals to improve application,” applied where the decal will go; Micro Sol “setting solution is for the most difficult irregular surfaces to be found on models,” applied after the decal is positioned (Microscale Industries). Before you wet anything, plan — the IPMS guide notes “the first step for applying decals is planning”: compare decals to reference photos, make paper copies for complicated markings, and test-fit large decals before painting bands or camouflage around them (IPMS McKinstry).
- Cut each decal close to the printed image.
- Dip it in warm water for roughly 15–60 seconds, depending on the decal’s age and brand; set it on a clean surface until it slides.
- Brush Micro Set onto the glossed model surface where the decal will sit.
- Slide the decal from the backing into position and align it with a wet brush.
- Gently roll a damp cotton swab from the center outward to remove water and air — never drag across the decal, or it may move.
- Apply Micro Sol only after the decal is correctly positioned, with as few strokes as possible.
- Do not touch it while it wrinkles and dries.
That last step is non-negotiable. Microscale is explicit: “Do not touch until the decal has dried, as the decal is very soft at this stage and could be easily damaged” (Microscale Industries).
Fixing Decal Mistakes
- Decal won’t settle into panel lines: apply Micro Sol after positioning, then leave it alone; a second application can help after the first has dried.
- Decal folds on itself: immediately flood it with clean water or Micro Set and tease it open with a wet brush, not tweezers.
- Decal tears: align the pieces on the model while wet and let a later clear coat help hide the repair.
- Silvering after drying: carefully prick or slit the clear film, apply Micro Sol (or a stronger decal solvent) so it can reach the trapped air, and gently press flat only once the film has softened and is safe to manipulate (FineScale Modeler forum).
- Large markings — long fuselage stripes, invasion stripes, walkway lines, full-side civil markings: divide them into manageable sections. IPMS/USA review evidence warns that large side markings can fold and stick to themselves, and recommends cutting them into sections (IPMS/USA Reviews).
Finishing Coats and Basic Weathering — The Details That Separate “Good” From “Great”
Topcoats — Gloss, Matte, or Satin?
Topcoats seal the paint and decals, unify the finish, and set the correct sheen for the subject.
Gloss clear goes down before decals and before most enamel or oil panel-line washes, because its smooth surface reduces silvering, protects the paint, and helps capillary action carry a wash through recessed lines. The proven order: paint, gloss clear, decals over the gloss, seal, then wash (ScaleSpot).
Matte or flat clear is the usual final finish for many WWII and modern military aircraft because it kills toy-like shine and blends decals into the paint. But match the sheen to the real aircraft: some finishes, including Glossy Sea Blue, were meant to be glossy or semi-gloss rather than dead flat (The World Wars).
Satin is often the most realistic compromise for jets, weathered late-war naval aircraft, and maintained-but-not-showroom finishes. Choose sheen by reference photo rather than flat-coating everything automatically.
Rattle-can clear warning: shake thoroughly, spray light coats, avoid cold or high-humidity conditions, and test on a spoon or scrap wing before spraying over decals.
A Beginner-Friendly Introduction to Weathering
The source books define weathering as simulating weather, wear, sun, and the action of use on a machine — and they caution, by repeated example, that restraint matters because overdone effects ruin realism. Real operational aircraft are maintained, so less weathering is usually more convincing than dramatic streaks everywhere.
Three beginner-safe techniques:
- Panel line wash. Apply over a gloss clear coat. Touch the wash into recessed detail, let capillary action carry it, then wipe the excess in the direction of airflow with a barely damp cotton swab or cloth. A mild mineral solvent is preferred over hotter thinners (ScaleSpot). Because black wash over a black or very dark color is hard to read, mix a light gray artist oil with the thinner instead. And keep the safety rule: Weber says Odorless Turpenoid is a petroleum-distillate product, is combustible, has harmful vapor, and is a skin irritant, and should be used “only with adequate ventilation” (Weber Art).
- Exhaust staining. Build it slowly with highly thinned dark brown, gray, or black-brown paint, sprayed or brushed in the direction of airflow, then stop before it turns cartoonish. Study photographs before you place stains.
- Paint chipping. Use a silver artist’s pencil sparingly on leading edges, walkways, fasteners, and panel doors — the spots where crews and airflow would actually wear paint.
A weathering caution the books make plain: a silver pencil is wrong for fabric-covered control surfaces, wooden propellers, and aircraft whose real exposed underlayer was primer or dope rather than shiny aluminum. The material matters — do not treat a wooden or fabric-covered part like bare metal.
The big-picture rule, echoed in the master modelers’ own work, is restraint: do not let a beat-up finish dominate the model unless you are deliberately building a wreck in a boneyard.
Hand-Painting Final Details
Save the small stuff for after the major exterior colors and most clear coats, since small parts are easily knocked off or buried under overspray. A clean detail order:
- Wheel hubs first, then tires in dark gray or Rubber Black — avoid straight black, which always looks too stark.
- Oleo struts in chrome or aluminum.
- Propeller blades and tips, then spinner bands.
- Exhaust stacks in dark iron or burnt metal.
- Navigation lights with a silver base and clear red/green if molded clear.
Tamiya colors work as examples, not mandates: XF-16 Flat Aluminum, XF-84 Dark Iron, and XF-85 Rubber Black (Tamiya color chart). For oleo struts, landing lights, mirrors, and tiny reflective lenses, Molotow Liquid Chrome is the standout: Molotow says on smooth, non-absorbent plastics, Liquid Chrome achieves its full mirror effect, describing it as alcohol-based, highly opaque, permanent, refillable, and airbrush-compatible — while warning that sealing it can diminish the chrome effect (Molotow; Molotow USA).
Troubleshooting — When Things Go Wrong (and They Will)
Every modeler hits these problems, including experienced ones. Treat them as a normal part of learning, not a verdict on your ability. Here is the quick-reference fix list.
| Problem | Likely cause | Fix |
| Paint runs or sags | Too much paint too quickly, a can held too close, or a wet coat over a tack coat that hasn’t flashed | Let it cure, sand the run flat with 1000 grit or finer, polish if needed, then re-spray with a light tack coat. Don’t wipe a wet run — that makes a bigger scar |
| Brush marks | Paint too thick, a dry brush, or repeated strokes over partially dried acrylic | Keep thinner nearby, moisten the bristles, test the flow, overlap and minimize strokes; if already dry, cure, sand lightly, wipe, and repaint thinner (FineScale Modeler) |
| Orange-peel / rough texture | Paint drying before it lands, undershaken paint, a cold can, spraying too far, or a dusty environment | Work at the right distance, shake thoroughly, warm conditions, clean the area; sand and re-spray as needed |
| Frosted or chalky clear | Humidity, cold, or a heavy flat coat | Let it dry, apply a light gloss or satin coat to re-wet the surface if compatible, or wet-sand and recoat under better conditions |
| Paint won’t adhere | Mold release, finger oil, sanding residue, or no primer | Strip, wash in warm soapy water, dry fully, and re-prime from scratch (FineScale Modeler) |
| Decal silvering | Air under the carrier film over a flat or rough surface | Pin-prick, apply Micro Sol or a stronger decal solvent, press flat only when safe; prevent with a gloss coat and close trimming of the carrier film |
| Paint lifted by tape | Uncured paint, unprimed plastic, a greasy surface, or tape left too long or pulled too hard | Allow full cure before masking, use low-tack Tamiya tape, and peel slowly at a low angle |
| Airbrush spitting | Paint too thick, a partially clogged nozzle, low pressure for the mix, a dirty needle tip, or water in the airline | Thin incrementally, strain or remix, clean the needle tip, test on scrap, and add a moisture trap if condensation is present (Vallejo) |
| Decal tears | Old decals, too much handling, aggressive solvent too early, or moving the decal after Micro Sol softened it | Flood with water, align fragments with a wet brush, dry fully, hide gaps with matching paint; test one spare decal first and never touch after solvent |
FAQ — Common Questions Beginners Ask About Model Airplane Painting
What is the step-by-step process for priming and painting a plastic model airplane kit for the first time?
Model airplane painting for beginners starts by washing the parts or assembled subassemblies in warm water with a small amount of dish soap, then priming and applying thin color coats in multiple passes.
- Wash, rinse, and dry completely.
- Sand seams and sink marks, then remove dust from the panel lines and wipe down.
- Mask the cockpit and clear parts.
- Spray light primer, inspect, and repair any flaws it reveals.
- Apply color in thin coats rather than one heavy coat.
- Add gloss for decals, apply the decals with setting solutions, then seal.
- Weather lightly and finish with the appropriate flat, satin, or gloss sheen.
FineScale Modeler verifies the cleanup and primer steps, and Tamiya confirms Fine Surface Primer is suited to ABS and styrene plastic (FineScale Modeler; Tamiya USA).
How do I stop brush marks from showing up when I hand-paint a model airplane?
Brush marks on a model airplane are almost always caused by paint that is too thick and a brush that moves too much, so the cure is thinner paint and fewer, more deliberate strokes.
- Use model paint and stir it thoroughly.
- Move a small amount to a palette and moisten the brush with compatible thinner.
- Thin only enough for the paint to flow.
- Apply long, confident strokes and do not rework paint that has started to dry.
- If brush marks are already dry, cure the paint, sand lightly with fine grit, wipe clean, and repaint thinner (FineScale Modeler).
Can I use regular craft store acrylic paint to paint a model airplane kit, or do I need special model paint?
Regular craft-store acrylic can work for groundwork, bases, or some interior experiments, but dedicated model paint is the better choice for the aircraft itself.
- Model paints have finer pigments, better adhesion on styrene when properly thinned, and color ranges matched to aircraft standards.
- Vallejo Model Air, for example, is formulated for airbrush use with historical references including FS, RAL, RLM, and BS standards.
- For a first aircraft, use Tamiya, Vallejo, Mr. Hobby, AK, Mission Models, or another dedicated hobby line — and test compatibility before mixing brands (FineScale Modeler; Vallejo).
How long do I need to wait between paint coats when building a model airplane as a beginner?
Wait times for model airplane paint depend on the paint chemistry, coat thickness, temperature, humidity, and airflow, so use a conservative rule rather than a fixed number.
- Minutes between light passes when the product supports it.
- Overnight before decals or masking when in doubt.
- 24–48 hours before aggressive masking or solvent weathering.
- If the paint smells solventy, feels cool, or marks under a fingernail, it is not ready for tape.
An IPMS/USA review bears this out — 24 hours for cockpit primer, 48 hours for exterior primer, and another 48 before masking some clear work — and Microscale says decals should dry overnight before protective coats (IPMS/USA Reviews; Microscale Industries).
What is the best way to apply decals to a model airplane so they don’t silver or bubble?
Model airplane decals silver when applied over a flat or rough surface, so the fix is always to apply them over a fully cured, smooth gloss surface.
- Apply a gloss clear coat and let it cure.
- Trim the excess clear carrier film close to the image.
- Wet the surface with Micro Set, then slide the decal into place.
- Remove water and air from the center outward.
- Apply Micro Sol only after the decal is correctly aligned, and leave it untouched while it wrinkles and dries.
- Seal the decals after they have dried thoroughly (Microscale Industries; IPMS McKinstry).

Key Takeaways
- Paint success begins before paint: wash, sand, dust, prime, inspect, and fix flaws first, because primer reveals defects and paint reflects the surface beneath it.
- Use thin, multiple coats rather than one heavy coat — for rattle cans (Tamiya’s are synthetic lacquer for broad surfaces) and for brush-painted details, which need compatible thinner and minimal strokes.
- Decals need a gloss surface, patience, Micro Set for placement, Micro Sol for conformity, and a strict no-touch period while the solvent softens the film.
- Keep weathering restrained, sealed, and compatible: put oil or enamel washes over a gloss clear barrier, use mild thinner with ventilation, and never apply an enamel wash directly over an enamel base coat.
- Get color references right: Glossy Sea Blue ties to ANA 623 / FS 15042, and Tamiya XF-71 and XF-26 are not universal U.S. WWII cockpit colors — always check kit instructions and references first.