


The skill-level number on the box won’t tell you whether you’ll finish the model. Here’s what actually decides it — materials, part count, paint scheme, and shelf space — before you spend a dollar.
The Quick Answer: What to Buy First
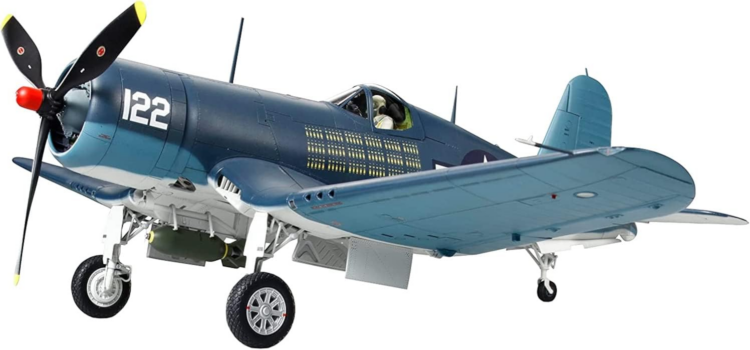
If you want one defensible default, buy one of the mainstream, injection-molded aircraft model kits in 1/72 or 1/48 scale: all plastic, a low part count for its subject, and a marking option that is mostly one color. Choose a product whose instructions, contents list, and catalog status you can look up before you pay.
Now the qualification that matters more than any of it. The right first kit is settled by your shelf space, your eyesight and fine-motor control, and the finishing method you actually own — not by the number printed on the box. Those numbers are manufacturer systems, and they are not interchangeable. Airfix publishes four levels and places Level 1 at roughly 25 to 50 parts with simple painting and limited decals. Revell points beginners at its Levels 1 and 2 in its customer FAQ, which describes them as usually 20 to 50 parts with simple color schemes. Both makers treat their levels as guidelines. Neither is measuring against the other.
One scope note: this guide is about choosing the kit and budgeting what goes with it. It is not a building tutorial, and it does not replace the instructions in the box.
Who This Guide Is For
This is written for anyone buying an unassembled static plastic aircraft kit, whether for themselves or as a gift. Current catalogs hold starter sets, glue-free snap systems, brand-new tooling, and deliberate reissues of half-century-old molds, often on adjacent pages, so the guide is as useful to a returning builder as to a first-timer.
Ideal reader profiles
- The true first-timer. Has never assembled a kit. The controlling variables are materials, part count, and a finish that works with a brush or a spray can.
- The space-constrained builder. One apartment shelf or a single display case. Assembled dimensions decide the purchase, and scale is the lever that controls them.
- The returning builder. Built kits years ago and needs to know that a familiar logo on a current box can sit on either recent tooling or a revived classic mold. Every kit number is its own research problem.
- The gift buyer or parent. Needs to know what makes a kit finishable rather than frustrating, and needs to check the exact product’s stated age grading. A colorful box marked “model kit” is not automatically a children’s product. The U.S. Consumer Product Safety Commission determines intended age from manufacturer statements, packaging, promotion, consumer recognition, and age-determination guidance, and notes that craft kits not primarily marketed to children may be general-use products.
Scope and exclusions
Radio-control aircraft are flying models with electronics and control requirements that belong in a different guide. Die-cast models arrive assembled or substantially finished, so buy those if you want display without assembly. Wood and card kits use different materials and methods entirely. Contest-level superdetailing and airbrush purchasing are separate decisions, and neither is required to finish a good model.
Why the Box You Pick Sets the Workload
Almost every difficulty a beginner runs into is loaded into the box before it is opened. The box determines the materials. The materials determine the adhesives, the cutting tools, and the preparation. The marking options determine how much masking and paint control the finish demands.
Three purchases account for most of the avoidable pain. A multimedia kit brings resin, photo-etched brass, or white metal, none of which weld with ordinary polystyrene cement. A four-color mottled camouflage scheme brings masking and paint-control demands that a single-color subject does not. A short-run kit bought purely on subject appeal can bring additional cleanup and fitting.
None of that makes those kits bad. It makes them a mismatch when the buyer has not chosen the extra work. Modelers have a name for the pile of projects that stall — the Shelf of Doom — and it is hobby vernacular rather than a diagnosis. The useful point is narrower and entirely within your control: you can remove avoidable dependencies at checkout, for free.
Aircraft Model Kit Basics: Decoding the Box
What’s actually in the box
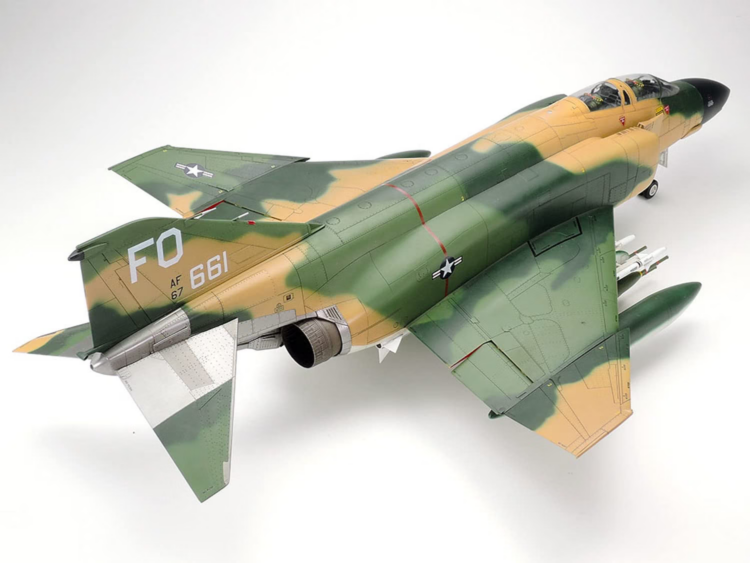
Most conventional plastic aircraft kits give you molded parts on frames, clear parts, waterslide decals, and an instruction sheet. Contents vary, so check rather than assume.
- Sprue (parts tree). The molded frame that carries the parts. Modelers generally say sprue; runner is the manufacturing-flow term.
- Gate (attachment point). The narrow bridge joining each part to the frame. You cut through it to free the part, then clean up what’s left.
- Flash. A thin film left behind when a little plastic flows between the mold halves during manufacturing. It slices away with a sharp No. 11 blade.
- Mold seam. The raised line where the mold halves met. It usually needs scraping or sanding.
- Locating pin. A peg meant to align mating parts. Whether a kit has useful ones is specific to that tooling.
- Waterslide decal. A printed marking released from its backing paper by water and slid onto the model.
- Clear parts. Transparent moldings — canopies, windows, lenses — that need masking before painting.
- Styrene (polystyrene). The plastic that ordinary model cement is designed to soften and weld. When a kit is described as all styrene, it means the structural parts are injection-molded plastic and nothing in the box requires resin, brass, or white-metal construction.
Box art is not a contents audit. The parts list, the instruction sheet, the official product description, and sprue photographs are the real evidence. A good manufacturer page states this plainly: HobbyBoss lists its 1/72 F4F-4 Wildcat, item 80220, as 19 plastic parts on four sprues, with resin, metal, photo-etched, and film accessories all marked not applicable.
Molding types, and what each demands of you
- Mainstream injection-molded. Built around polystyrene cement and standard cleanup. The best-supported default for a first conventional build.
- Short-run or limited-run. Special Hobby describes a historical short-run process using heat-resistant epoxy-resin molds rather than the usual steel tooling, which could produce variation across a batch; the company also later moved to galvanized metal tools that extend production runs. Some of its lines supplement plastic with resin and photo-etch. Research the exact kit rather than the brand.
- Multimedia. Plastic combined with resin, photo-etched brass, white metal, fiberglass, or vacuum-formed parts. Each addition brings its own adhesive and preparation requirements, because ordinary plastic cement will not weld resin or metal. That job falls to cyanoacrylate.
- Snap-together. Joining systems that need no glue, often precolored, sometimes using stickers instead of waterslide decals. Behavior varies by product: Airfix QUICKBUILD is push-together, needs neither glue nor paint, and can be broken down and rebuilt.
Skill-level ratings: what they mean and don’t
Skill-level numbering is manufacturer-specific. Airfix runs Levels 1 through 4, adding parts and techniques as the number climbs. Revell’s customer FAQ recommends Levels 1 and 2 to beginners, describing Level 1 as plug-in kits and Level 2 as basic gluing. Its published level system runs to five tiers and numbers them differently — a useful reminder that even one maker’s guidance can shift between pages. The scales, the boundaries, and the descriptions all differ, so a “Level 2” from one firm tells you nothing reliable about a “Level 2” from another.
What travels across brands is duller and more useful: the materials in the box, the part count measured against how complicated the subject is, the number of colors in the scheme you intend to build, and how much the instructions ask of you.
CALLOUT — Read the contents, parts, and paint plan, not the number alone.
Scale Explained: 1/72, 1/48, 1/32, and 1/144
How the ratio actually works
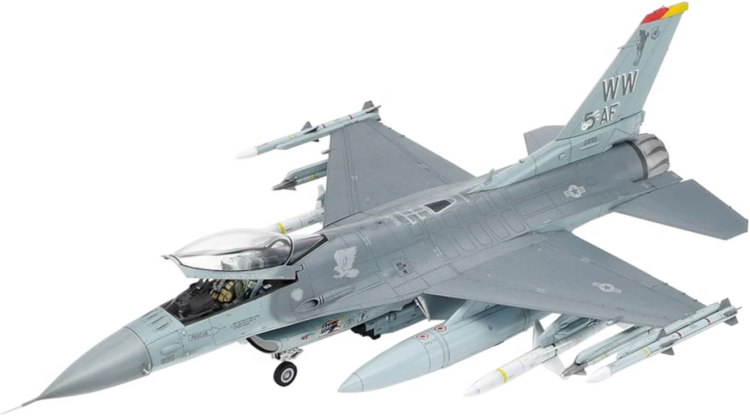
Scale is a ratio between model and full-size subject. In 1/48, one unit on the model stands for 48 of the same units on the real aircraft. Divide any full-size dimension by the denominator and you get the model dimension in the same unit. A larger denominator means a smaller model of the same airplane.
FineScale Modeler identifies 1/72, 1/48, and 1/32 as common aircraft scales and ties the choice directly to display restrictions, eyesight, and fine-motor control. That is the honest framing: bigger scale buys physical room for detail and larger handling surfaces; smaller scale buys display capacity. Neither guarantees a better model.
One consequence catches people out. Dimensions shrink linearly, but footprint does not. Moving the same aircraft from 1/72 to 1/48 makes it 1.5 times longer and about 2.25 times the plan area.
| Scale | Model length of a 36-foot aircraft | What it means for you |
| 1/24 | 18 in. | Largest parts, largest shelf demand |
| 1/32 | 13.5 in. | Big components, real space consumption |
| 1/48 | 9 in. | More visible detail, larger handling surfaces |
| 1/72 | 6 in. | Two-thirds the length of 1/48 |
| 1/144 | 3 in. | Very compact, very small components |
1/72 — the space-saving standard
For any given aircraft, a 1/72 model is two-thirds the length and span of the same subject in 1/48. Current Airfix, Academy, Hasegawa, Italeri, and HobbyBoss catalogs all carry 1/72 aircraft, so active manufacturer support is broad. ICM lists 1/72 aircraft too, though its published catalog dates from 2024.
The cost is physical. Smaller components and smaller markings ask more of your eyesight and fingers. And the scale is not a blanket space solution — a large transport or bomber in 1/72 can still overrun a small shelf.
A good 1/72 beginner profile is a single-engine subject, all-plastic contents, low part count, and a simple finish. The HobbyBoss F4F-4 Wildcat noted above fits that description on paper at 19 plastic parts; tooling age, instruction quality, and U.S. stock still need checking at the point of purchase.
1/48 — “quarter-inch scale”
The nickname comes from the arithmetic: a quarter-inch on the model represents one foot on the aircraft, because 0.25 in. × 48 = 12 in. Current Tamiya, Airfix, Academy, Italeri, and Eduard catalogs include 1/48 aircraft, as does ICM’s 2024 catalog.
Compared with 1/72, you get components that are half again as long and a great deal easier to hold, at the price of more than twice the display footprint for the same airplane. Larger parts do not automatically make a kit easier, though — part count, finish complexity, and engineering are independent of scale. FineScale Modeler’s own beginner walkthrough used an all-plastic Airfix 1/48 Boulton Paul Defiant night fighter precisely because it was simple and painted black.
1/32 and 1/24 — large scale
For the same aircraft, 1/32 is 1.5 times the linear dimension of 1/48, and 1/24 is twice. Large parts can genuinely help visibility and handling. Against that, you are buying more surface area to finish, more shelf, and often more complexity: Airfix’s own framework offers large 1/48 aircraft and 1/24 aircraft as Level 4 examples and associates Level 4 with 200-plus parts, complex schemes, multiple options, and the possible inclusion of resin. That is an Airfix-specific mapping, not a property of the scale itself.
Judge a large-scale kit by its exact part count, materials, scheme, and assembled dimensions. Never by the denominator alone.
1/144 — small scale
A 1/144 model is half the length and span of the same aircraft in 1/72, and a third of it in 1/48. Academy’s current release list includes 1/144 aircraft and Airfix maintains a 1/144 catalog filter, so the scale is actively supported.
It suits collections and large real-world subjects: a 120-foot airliner comes out around 10 inches long. The penalty is handling. Tiny components and tiny decal placement can frustrate a beginner more than the small footprint helps.
CALLOUT — The shelf-space reality check. Measure shelf width, depth, and usable height before you shop. Then find the kit’s assembled wingspan, length, and height — good manufacturer pages publish all three, as the HobbyBoss Wildcat page does at 122 mm long, 161 mm span, and 54 mm high — about 4.8 in. long, 6.3 in. across, and 2.1 in. tall. Add clearance for propellers, wingtips, antennas, and any display cover rather than matching the shelf exactly. And if you want a group of models to read as a set, FineScale Modeler recommends keeping them in one constant scale so their size relationships stay true.
The Brand Landscape: Who Makes What, and for Whom
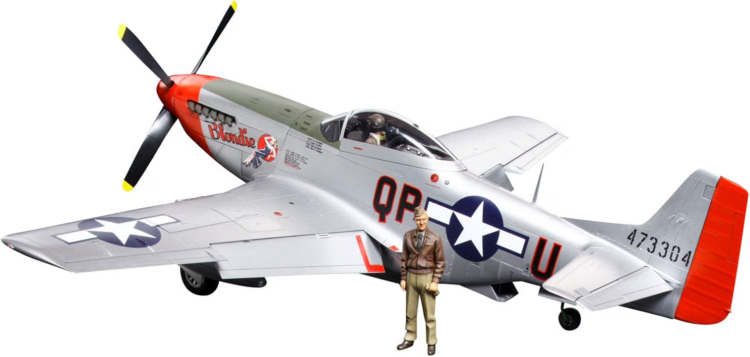
A logo tells you which catalog you are shopping in. It does not tell you the age of the mold, who cut it, what edition you are holding, or how that specific kit goes together.
Value and accessibility
Airfix, Revell, and Italeri publish explicit beginner-facing pathways, which cuts your search time considerably. Airfix’s four-level system puts Level 1 at 25 to 50 parts with a simple scheme and limited decals, glue and paint required. Revell’s beginner guidance points at Levels 1 and 2 at roughly 20 to 50 parts. Italeri organizes its aircraft catalog by 1/72 and 1/48 and maintains a separate beginners category alongside them.
Two practical notes. A starter-labeled line narrows the field but does not excuse you from reading the box, because these systems are guidelines, not standards. And Revell states that spare-parts inquiries need the exact kit number, and it points owners of older, out-of-production models toward 3D-printing services or aftermarket manufacturers instead — a real argument for buying something current if you can.
Japanese and Korean brands with dedicated aircraft ranges
Tamiya, Hasegawa, and Academy all maintain dedicated aircraft ranges: Tamiya a 1/48 aircraft series, Hasegawa a 1/72 series, and Academy current 2026 aircraft releases across 1/48, 1/72, and 1/144. Treat a strong reputation as a reason to build a shortlist, then decide on the exact release. Tooling age and edition remain the deciding facts.
Detail-forward and multimedia specialists
Eduard, Special Hobby, and Czech Master Kits sell detail and variant choice by design. An Eduard ProfiPACK edition bundles the plastic kit with photo-etched parts, masks, and a large decal sheet, typically four to six marking options plus stencils. Special Hobby’s plastic lines can add photo-etch and resin, and its limited-run resin lines add white metal and vacuum-formed canopies, and CMK maintains resin aircraft-detail ranges alongside it.
These are excellent kits and the wrong first purchase, for exactly one reason: they add materials and techniques that FineScale Modeler advises beginners to avoid at the start. Included photo-etch is not a defect. It is a commitment.
The broader field
HobbyBoss, ICM, and Meng all maintain official aircraft catalogs, and individual product pages from this tier can be unusually informative — scale, part count, sprue count, media, and assembled dimensions in one table. Use official pages for contents and dimensions, and independent builds of the same release for fit and instruction experience. Country-of-origin generalizations are leads to investigate, not facts.
What a brand name predicts, and what it doesn’t
A brand predicts its naming conventions, its product families, its support routes, and its packaging style. It does not predict the mold’s age or origin, the fit, the condition of the decals, or whether a secondhand example is complete.
Reissues and reboxes are the reason. Airfix Vintage Classic openly revives classic models and sells them alongside current products, and databases such as Scalemates record release and rebox relationships kit by kit. Record the manufacturer product number, release year, tooling year, scale, variant, edition name, and barcode where you can get them — then match any review you read to that same product number.
Essential Buying Criteria, in Priority Order
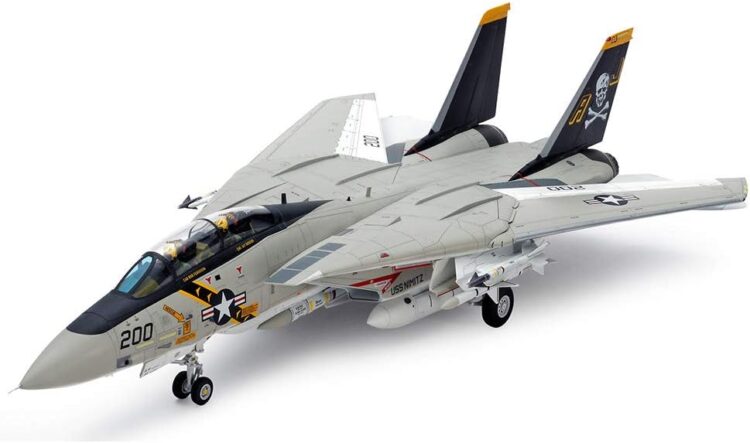
- All-styrene construction. For a first conventional build, this outranks everything. Aaron Skinner, editor of FineScale Modeler, puts it directly in the magazine’s beginner guide: “Make sure the model aircraft kit is all plastic. Avoid kits with photo-etched or white metal and cast resin parts.” How to check: the parts list and the contents line on the manufacturer’s product page.
- Part count, read against subject complexity. Use it as a screening signal, not an absolute difficulty score. Both Airfix and Revell associate higher counts with higher in-house difficulty, but a twin-engine bomber with 90 parts is not the same proposition as a 90-part fighter, and optional weapons or alternate variants can inflate a count without making assembly harder.
- Paint scheme complexity. One dominant color, or a simple hard-edged two-tone, minimizes masking and keeps brush and spray-can painting viable. FineScale Modeler suggests late-World War II U.S. Navy and Marine Corps subjects and silver-finished British Cold War types as classic monochrome starting points.
- Scale against space, eyesight, and dexterity. Resolved with the framework in Section 5. Use assembled dimensions, never box dimensions.
- Instruction quality. Look for clear exploded diagrams, legible part numbers, a sensible assembly sequence, alternate-part callouts, a decal map, and paint references you can actually source in the U.S. Inspect the instruction PDF or photographs where a manufacturer publishes them.
- Decal sheet completeness and condition. Confirm the sheet is present and matched to the markings you intend to build. On used or long-stored kits, ask for a close, glare-free photograph; yellowing, cracking, and missing sheets are real inspection risks.
- Tooling history and production status. A current listing does not prove a current tool. Trace the lineage before you assume.
- Subject motivation. Last on the list and still worth something. Given two equally manageable kits, the one you actually want on the shelf is the better buy.
The minimum pre-purchase record: media, complexity, finish, scale and assembled dimensions, instructions, decals, tooling and edition. Any of these can be deliberately overridden — a builder committed to a rare airframe may knowingly accept old tooling or multimedia — but the override should be conscious and priced.
What you can safely skip on a first purchase
Photo-etched fret, resin cockpit, turned-metal barrels, aftermarket decal sheets, canopy masks, resin wheels, an airbrush and compressor, motorized tools, polishing systems, and a display base. The reasoning is the same for all of them: each adds cost and a new skill dependency before you know whether you need it. Masks save time and premium tools improve comfort, but none of it is required to find out whether the hobby suits you. Buy additions when a specific build step creates a defined need — not before.
What Ownership Actually Costs
The kit is one line on the invoice. Total cost of ownership is the kit plus tools, adhesives, paint, finishing supplies, safe painting conditions, replacement consumables, and somewhere to put the finished model. Compare complete baskets, not box prices. A cheap kit that demands eight colors and a special adhesive can cost more to finish than a dearer one in a single scheme.
The starter toolkit
FineScale Modeler’s beginner set is six items: sprue or side cutters, sanding sticks in assorted grits, liquid model cement, a hobby knife with spare No. 11 blades, fine-tipped tweezers, and a couple of good-quality paintbrushes. Airfix’s own essentials list independently arrives at much the same place, adding clips and clamps as useful for holding glued parts.
Most of that is durable and carries across every future build. The cutters, knife handle, tweezers, and brushes are one-time purchases; sanding sticks are semi-consumable; cement, paint, and blades are pure consumables. Budget for the toolkit as an additional cost alongside the kit, because on an inexpensive first kit the supplies can add up to more than the box itself.
Model cement is for compatible polystyrene joints. It works by softening the plastic and welding the surfaces, so use it sparingly, and don’t substitute a household solvent or adhesive without confirming the plastic is compatible.
Consumables and recurring costs
Replacement blades and abrasives, cement, paint, the right thinner or cleaner for your paint system, masking material, decal-setting products if you use them, and finishing coats. Consumption tracks model size, painting method, number of colors, and the finish standard you’re chasing far more than it tracks the kit’s price. Instruction sheets ordinarily supply paint recommendations, so read the paint map and inventory what you already own before ordering duplicates.
Spray products and solvent-bearing coatings carry real requirements. Follow the product label and safety data sheet, match ventilation and ignition control to the instructions. The U.S. Occupational Safety and Health Administration’s guidance on painting and other coatings is written for industrial work, but its core points scale down to a bench: ventilate, keep ignition sources away from solvents, and store solvent-soaked rags and open thinners in covered containers. Sharp No. 11 blades cut people; work on a stable surface and replace dull blades rather than forcing them.
Where spending more genuinely pays
Priority order for incremental spend: a safe, ventilated workspace first; then sharp, controllable cutters and a fresh blade — Airfix specifically advises cutters rather than scissors, because a clean cut at the attachment point is what keeps you from crushing or stressing the part; then an appropriate cement; then usable brushes or a workable broad-finish method; then abrasives; then convenience tools.
The plain diminishing return: no amount of money spent on the kit compensates for a paint scheme that exceeds your finishing method. The best upgrade is the one that fixes a problem you actually hit on the last build.
Matching the Kit to You: Recommendations by Use Case
These are kit profiles rather than single product numbers, so they stay useful as catalogs turn over. Stock and pricing change constantly; verify both at checkout.
First build, brush or spray can only
All-plastic contents, a manufacturer beginner tier, and a predominantly single-color exterior or a scheme that doesn’t demand complicated masking. Airfix Level 1 sits at 25 to 50 parts; Revell’s beginner band is roughly 20 to 50. A simple paint scheme can matter more to a satisfying result than an especially low part count. Spray cans handle broad color well when applied in multiple light passes, starting and ending each pass past the edge of the model; brushwork still covers the details. Before you commit, confirm the paints for your chosen scheme exist in the system you plan to use.
Limited shelf space
1/72 or 1/144, single-engine or otherwise compact subject, and dimensions confirmed against the shelf. Scale alone is not enough — a compact fighter in 1/48 can occupy less space than a large bomber in 1/72. Accept the tradeoff going in: smaller parts and smaller markings.
Building with a child
Check the exact product’s age grading and small-parts warnings, not just the product line. A snap system can be the right answer: Airfix QUICKBUILD is precolored, push-together, needs no glue or paint, can be taken apart and rebuilt, and is labeled for ages six and up. Note that it’s a construction-toy pathway, and that not every QUICKBUILD declares a scale — the F-35B Lightning II, item J6040, is listed as No Scale, while the Tiger I, item J6041, is listed as 1:35. A conventional glue kit teaches more of the real workflow, but it introduces knives, cutters, small parts, adhesives, and paint. The adult keeps control of all four.
Returning builder
Pair a familiar subject with a well-documented current kit before adding multimedia back into the mix. The one thing to check hardest is tooling lineage, because a brand you remember fondly may be selling you the mold you remember fondly. Inventory your old cement, paint, blades, and decals rather than assuming they survived storage. Masks and photo-etch can come later, once your hands remember what they’re doing.
Committed to one specific aircraft
When the subject is fixed, compare every available kit of that airframe before buying the first one you find: exact variant, scale, tooling year, release year, original tool owner, molding method, included media, markings, assembled dimensions, and build reports of that same release. The aircraft’s name alone may not identify the airframe, period, or operator you want. A rare subject may only exist as old tooling or a short-run multimedia kit — that’s a legitimate choice, as long as you price the extra tools, time, and skills before you click buy. If nothing suitable exists, waiting or switching scale beats buying a box whose demands exceed your time.
Pitfalls, Limitations, and Buying Mistakes
Kit-level traps
- New box art over an older tool. Current packaging proves the product is being sold now, not that the mold is new. Check the tooling timeline.
- Part count misread in both directions. A high count can reflect optional weapons, alternate variants, or duplicated detail rather than uniformly hard assembly. A low count can still hide difficult masking or large, fragile decals.
- Multimedia filed mentally under “detailed.” It is detailed. It also requires tools and adhesives most first-time buyers don’t own. Airfix Level 3 may include photo-etch and Level 4 may include resin; Eduard ProfiPACK includes photo-etch and masks by design; Special Hobby lines may add white metal or a vacuum-formed canopy.
- Decals in long-stored stock. Yellowing and brittleness are inspection risks worth taking seriously, and brittleness in particular may not reveal itself until the decal is in water.
Read the instruction PDF before purchase where one is published. Count media and techniques, not only parts.
Marketplace warning signs
Concrete, checkable red flags beat suspicion. Be more cautious when a listing shows only box art and never the sprues, uses vague completeness language, carries a product number that doesn’t match the pictured box, or when the seller won’t photograph the decal sheet and clear parts. Ask for images of both box ends, the product number, every sprue front and back, the clear sprue, the decal sheet, the instructions, any loose parts, and any started assembly. A seller who lacks the specialist vocabulary isn’t dishonest — objective photos settle it either way.
A price far below comparable listings may be a bargain or an omission. Price by itself can’t tell you which.
Save the listing description and images before you pay, and use the platform’s protected payment and dispute channels rather than moving the transaction off-site for convenience. Read the current terms at checkout, because marketplace policy changes: eBay states that its buyer protection covers items that don’t match the listing, and that a seller may deduct from a refund when a returned item comes back used, damaged, or missing parts. A return window is not a substitute for inspecting the listing first.
Behavioral traps
Buying faster than you build converts uncertainty about your own preferences into inventory. Chasing corrections and optional detail expands cost and complexity without advancing the model in front of you. The community has names for all of it — stash, Advanced Modeler Syndrome, analysis paralysis — and they are vernacular, not clinical categories.
Collecting unbuilt kits is a legitimate hobby in its own right. It becomes a buying mistake only when it collides with your own goals, budget, space, or expectations. A one-kit rule until you’ve settled on scale, subjects, and paint system is cheap insurance. So is defining success on the first build as finished and learned from, not contest-grade.
When not to buy at all
Waiting is a valid outcome of this guide. Postpone when you have no space to use and store the required paint products according to their labels; when the budget won’t cover the essential tools after the kit; when the assembled dimensions exceed your measured display space and no realistic alternative exists; when a used kit’s contents can’t be verified and the loss would sting; or when the only available version demands materials you don’t currently want to learn. A no-glue, no-paint construction product can be a workable substitute when chemicals or painting space are the barrier — provided its age grading and non-scale presentation suit your purpose.
Not now is not never.
Final Purchase Checklist
Ten checks, each doable in under a minute before checkout.
- 1. Kit number and manufacturer confirmed against the official product page.
- 2. All-styrene contents confirmed — no resin, brass, or white metal listed, or their inclusion is deliberate.
- 3. Part count confirmed and weighed against how complex the subject is.
- 4. Number of colors confirmed for the specific marking option you intend to build.
- 5. Scale confirmed, then assembled dimensions confirmed against your shelf, with clearance.
- 6. Paint callout system confirmed, and those paints sourceable in the U.S.
- 7. Decal sheet confirmed present and, on a used kit, clearly pictured.
- 8. Every tool the build requires is owned, or budgeted now.
- 9. Seller condition description and current return terms are acceptable.
- 10. Tooling history and production status understood, including whether the kit is replaceable.
Not every box passes every line. The point isn’t perfection — it’s knowing which compromise you’re accepting.
CALLOUT — Buy the tools with the kit, not after it.
Frequently Asked Questions
Q: I’ve never built a model before — what scale should I pick for my very first aircraft model kit, 1/72 or 1/48?
A: Neither scale is universally best for a first aircraft model kit. Pick based on your constraints:
- Choose 1/72 when shelf footprint is the binding limit.
- Choose 1/48 when larger parts better suit your eyesight and fine-motor control.
- Either way, calculate or verify the finished dimensions of the actual aircraft. Divide the real span and length by 72 or 48 and compare against your shelf before deciding.
- Remember that a big airplane in 1/72 can be larger than a small one in 1/48.
Q: What’s the complete list of tools I need to buy before I open my first aircraft model kit?
A: The documented core toolkit for a first aircraft model kit is six items: sprue or side cutters, sanding sticks in assorted grits, liquid model cement, a hobby knife with spare No. 11 blades, fine-tipped tweezers, and good-quality paintbrushes. Add to that:
- A stable cutting surface.
- The specific paints your chosen marking option requires.
- Any protective equipment or ventilation the paint and cement labels direct.
- Optionally, clips or clamps to hold glued parts while they set.
This is a functional minimum for a conventional plastic kit, not a guarantee that a specialized kit needs nothing else.
Q: How do I tell whether a model airplane kit is actually beginner-friendly before I buy it online?
A: Judge a model airplane kit’s beginner-friendliness from the exact product’s media, part count, finish, scale, dimensions, instructions, and tooling history — not from the box’s skill number. Work through it in this order:
- Confirm the contents are all plastic, with no required resin, photo-etch, or white metal.
- Check that it sits in the maker’s beginner tier, and read the part count against the subject’s complexity.
- Count the colors in the marking option you want to build.
- Compare assembled dimensions to your shelf.
- Preview the instructions if the manufacturer publishes them.
- Trace the tooling lineage so you know whether you’re buying a recent mold or a reissue.
Q: Can I build and paint a beginner aircraft model kit without owning an airbrush?
A: Yes — a beginner aircraft model kit can be built and painted without an airbrush. Here’s how the workflow holds together:
- Spray cans cover broad areas when applied in several light passes, each starting and ending clear of the model.
- Brushes handle cockpit interiors, small parts, and detail work.
- Choosing a mostly one-color scheme removes most masking from the equation.
- Follow the product’s safety directions for ventilation and handling, whichever method you use.
Q: What’s the real difference between Airfix, Revell, and Tamiya aircraft model kits for a beginner?
A: For a beginner, the defensible differences between Airfix, Revell, and Tamiya sit in each exact kit, not in a universal brand hierarchy. What the official evidence supports:
- Airfix publishes a four-level skill system, with Level 1 at roughly 25 to 50 parts, and separately reissues classic tooling under its Vintage Classic line.
- Revell points beginners to Levels 1 and 2 at roughly 20 to 50 parts, and requires the exact kit number for spare-parts inquiries.
- Tamiya publishes a substantial 1/48 aircraft series.
None of that establishes how any individual box fits together. Compare product number, tooling age, contents, instructions, and a build report of the same release.
Q: Should I buy a used or vintage model airplane kit on eBay to save money, or is that a mistake for beginners?
A: A used or vintage model airplane kit is a reasonable buy only when its exact contents and added risks are visible and acceptable to you. Before bidding:
- Ask for photographs of every sprue, the clear parts, the decal sheet, and the instructions.
- Verify the kit number against the manufacturer’s own catalog page and trace the tooling.
- Save the listing description and images, and read the current return terms.
- Accept that decal serviceability may stay unknown until you actually use them.
A discontinued subject can justify all of that. A first build usually doesn’t need to.

Key Takeaways
- Buy all-plastic, mainstream tooling with a low part count. It removes the dependencies that turn a first build into a stall.
- Settle scale before subject. It is a space-and-handling decision, made with assembled dimensions and a tape measure.
- Skill-level labels are manufacturer systems. Part count, color count, and the media in the box are the data that travel.
- Budget the toolkit alongside the kit, and buy the exact release rather than the logo on the lid.