


Pick the scale model airplane kit your shelf, hands, and budget can actually support — then check the tooling, the parts, and the hidden supply list before a tempting box becomes an unfinished project.
The Quick Answer: What to Buy for Your First Build
Buy a mainstream, injection-molded, single-engine monoplane with a documented recent tooling, a modest part count, clear instructions, and a completed build review you can read before you pay. That combination is the lowest-risk configuration among model airplane kits, and it is the one that survives contact with an unpracticed pair of hands.
The qualification matters as much as the recommendation. The default scale of 1/48 only holds if the finished dimensions fit your shelf and you actually prefer larger parts. Space, supervision, and available tools all outrank scale preference.
- Limited space → go 1/72, after comparing the listed assembled length and wingspan against your shelf depth and width.
- Building with a child → choose a manufacturer-designated snap or click system, plus a supervision plan. Do not assume a “starter set” is glue-free; Airfix’s Starter Set Supermarine Spitfire Mk.Vc, item A55001, includes glue, while Revell defines its Level 1 as plug-in assembly requiring no glue.
- Returning after decades → prioritize a newer tooling and a current full-build report over nostalgia for a remembered brand.
CALLOUT — Buy This, Not That
| Buy this | Not that |
| A documented tooling history for the exact item number | Fresh box art on an unidentified mold |
| Published assembled length and wingspan | Box dimensions |
| A modest part count and readable instructions | An unexplained skill number |
| A relevant full-build review | Brand reputation alone |
| Verified seller terms | An unusually low price, by itself |
Why the First Kit Decides Whether You Finish the Second
A demanding kit hands a beginner work that has nothing to do with learning the hobby: gap filling, ambiguous alignment, complicated masking, fragile detail, and long option branches. Those tasks show up even in kits the hobby regards highly. In his IPMS/USA build of Tamiya’s 1/32 North American F-51D Mustang Korean War, item 60328, reviewer Dan Brown records screws, magnets, photo-etch, polycaps, many subassemblies, extensive masking, and several fit corrections — alongside a conclusion that the kit is excellent.
Engineering is the one variable you can inspect before you pay. Patience, available evenings, and how much you like the airplane are yours to manage. A forgiving first kit removes avoidable friction; it does not guarantee you finish. But friction is exactly what feeds the shelf of doom, the hobby’s own name for projects set aside indefinitely, and the stash, the pile of unbuilt boxes that grows while nothing gets finished.
Who This Guide Is For — and Who Should Skip It
Ideal reader profiles
- The absolute first-timer. Governing constraint: assembly simplicity and the supplies the kit actually requires.
- The adult returning after decades away. Governing constraint: tooling generation and current build evidence, not brand memory.
- The parent or gift buyer. Governing constraint: the item’s age label and warnings, glue and blade exposure, small parts, and a realistic supervision plan.
- The collector committing a shelf to one scale. Governing constraint: finished dimensions and scale consistency.
These are not skill labels. Each is a decision lens that can change the correct scale, the correct assembly system, or the acceptable complexity. The useful question to ask yourself is which failure would sting most: a model too large for the room, parts too small to handle, chemicals you can’t safely use, or engineering beyond your patience. Let that answer override generic advice.
Scope and exclusions
This guide covers unassembled static-display aircraft kits in injection-molded polystyrene, including both glue-required and snap/click variants.
It does not cover:
- Radio-control flying aircraft and balsa free-flight models — flight hardware and airworthiness criteria demand entirely different buying checks.
- Die-cast and prebuilt display models — there is no assembly to evaluate. If you want a finished collectible, buy one.
- Vacuform kits and advanced all-resin or multimedia kits — different cutting, fitting, dust, and adhesive demands.
Resin and photo-etched brass are not unsuitable in themselves. They sit outside the first-kit default because they add tools, adhesives, fitting work, and safety considerations at the moment you have the least capacity to absorb them.
Model Airplane Kit Terminology: What the Box Is Actually Telling You
A box or product page can reliably state scale, item number, part count, skill level, and included materials when the manufacturer publishes them. It cannot, by itself, establish fit, decal behavior, or ease.
Sprues, gates, flash, and part count
The sprue is the plastic framework carrying the molded parts; industrially, the feed channels are the runner, though hobby usage calls the whole frame a sprue. A gate is the narrow connection between part and frame that must be cut and cleaned. Flash is the thin, unwanted plastic at a part edge or mold parting line.
Part count is a workload clue, not a quality score. A higher count usually means more removal, cleanup, identification, painting, and joining operations — though duplicate options and unused parts inflate the number. Airfix lists item A55001 at 26 parts. Brown’s review of Tamiya item 60328 catalogs plastic plus photo-etch, screws, nuts, shafts, polycaps, magnets, and multiple configuration options. Complexity and excellent engineering coexist comfortably.
Count the things that don’t look like work: repeated stores, landing-gear pieces, cockpit decals, and separate transparencies.
Kit types you’ll actually encounter
- Mainstream injection-molded styrene. Parts require removal, cleanup, assembly, and finishing. Glue and paint are usually required unless the page says otherwise.
- Snap/click. Mechanical joints replace glue at the main assembly stage where the manufacturer states it. Lowest chemical and assembly barrier.
- Limited run. Produced in smaller quantities, typically covering subjects the majors skip, and conventionally associated with more builder preparation.
- Multimedia. Styrene supplemented with resin or photo-etched brass. Eduard’s ProfiPACK editions document included photo-etch and masks; its Weekend Edition A6M2 Zero Type 21, catalog 84189, documents their absence.
Snap does not mean toy-like, and glue-required does not guarantee accuracy or fit. These are assembly systems, not quality grades.
Skill-level ratings, and their limits
Airfix lists A55001 as Skill Level 1 alongside its 26 parts. Revell explains its Levels 1 and 2 through glue requirements, lower part counts, and simpler color schemes, and puts the typical component range for those levels at roughly 20 to 50 parts.
Read those ratings inside one manufacturer’s system only. They do not disclose tooling age, real-world fit, decal behavior, canopy seams, or whether optional configurations complicate the build. For those, you need a tooling database and a completed build.
“New tool” versus “new boxing”
This is the single most useful distinction a beginner can learn. Tooling timelines separate three different events: a new tool is a newly created mold, new parts signals a modification, and a rebox is a later package of existing tooling.
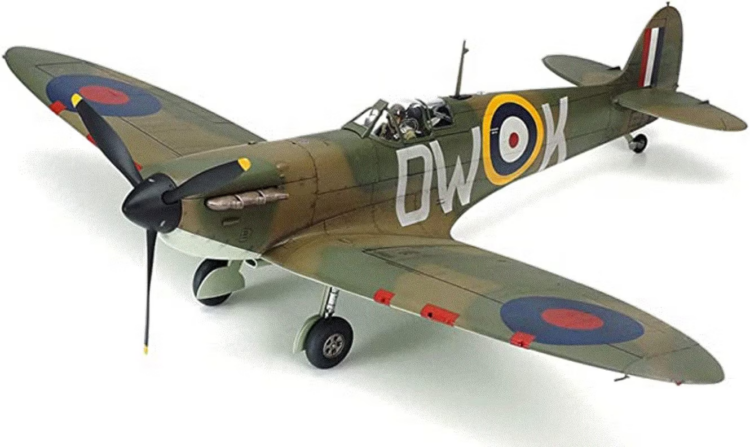
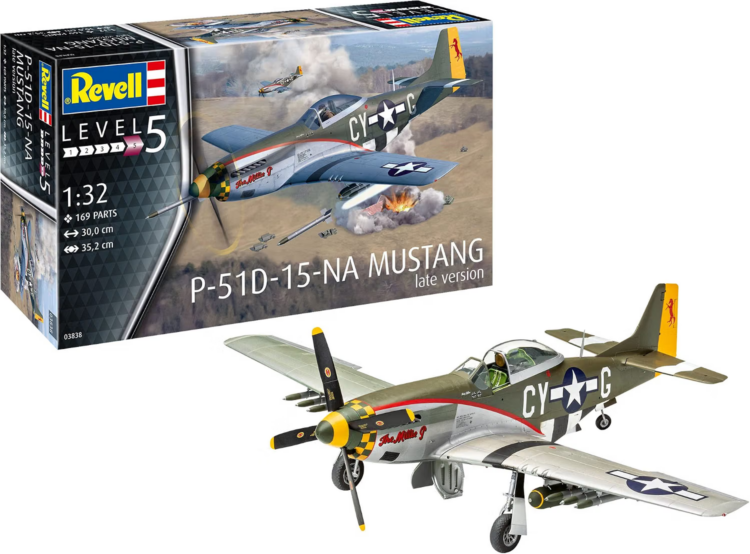
The contrast is concrete. Scalemates records Airfix A55001 as a 2020 new tool and Tamiya’s 1/48 Supermarine Spitfire Mk.I, item 61119, as a 2018 new tool — but records Revell’s P-51D-15-NA Mustang Late Version, item 03838, as a 2021 new-parts release on tooling first cut in 2017. A current box, a fresh decal sheet, and a recent release date cannot establish a current-generation mold.
Older tooling is not automatically unusable, and new tooling is not automatically trouble-free. The timeline tells you provenance. A build review tells you behavior.
Choosing Your Scale: 1/72, 1/48, 1/32, and the Outliers
A scale ratio states how model dimensions relate to the full-size aircraft. At 1/72, one unit on the model represents 72 on the real airplane; at 1/48, one represents 48. As FineScale Modeler’s primer on converting scale ratios and its downloadable chart lay out, the rest is arithmetic — and the arithmetic is unforgiving on a shelf.
| Scale | Model length, 36-ft aircraft | Rectangular footprint vs. 1/72 |
| 1/144 | 3 in. | 0.25× |
| 1/72 | 6 in. | 1× |
| 1/48 | 9 in. | 2.25× |
| 1/32 | 13.5 in. | 5.06× |
| 1/24 | 18 in. | 9× |
Scale does not determine part count, fit, or difficulty. Compare the exact kit.
1/72 — the smallest footprint
For the same subject, a 1/72 model is two-thirds the length and span of 1/48 and takes less than half the rectangular footprint. Airfix publishes A55001 at 5.2 in. (13.1 cm) long and 6.2 in. (15.7 cm) across — a single-engine fighter that lives comfortably on a narrow shelf.
Smaller overall does not always mean easier. The parts and the areas you must mask shrink with everything else.
Best for: limited display space, larger multi-engine subjects, and buyers who knowingly accept smaller working parts.
1/48 — the scale long called “quarter scale”
At 1/48, a quarter-inch on the model represents a foot on the aircraft, which is where the old “quarter scale” nickname comes from. Compared with 1/72, you get 1.5 times the length and span — easier-to-see detail — at 2.25 times the shelf footprint.
It is a defensible default only once the finished dimensions and part count actually suit you. Tamiya item 61119 and Eduard catalog 84189 both show what a currently accessible 1/48 ecosystem looks like; neither proves the scale is right for every beginner.
1/32 and 1/24 — detail you can see, space you may not have
Against 1/72, 1/32 multiplies linear dimensions by 2.25 and footprint by roughly 5.06. For 1/24, it’s 3× and 9×.
Large parts are not simple parts. Brown’s F-51D build documents extensive internal detail, hardware, configuration options, and masking. Richard Petts, the Airfix illustrator who worked on the instructions for the company’s 1/24 Supermarine Spitfire Mk.IX, described a project with a great many parts and stages.
Buy at these scales once you’ve confirmed display space, budget for supporting supplies, and tolerance for a long instruction sheet.
1/144 and 1/100 — compact collections
For the same subject, 1/144 is half the linear dimensions and a quarter the footprint of 1/72; 1/100 works out to 0.72× linear and about 0.52× footprint. Compactness is an objective benefit. Detail level and ease remain kit-specific — compare finished dimensions and instruction steps, not the scale label.
Scale compatibility and the display-shelf math
Figures, vehicles, bases, and replacement parts at a different scale represent a different proportional size and will read wrong next to the aircraft. Mixing scales is a legitimate aesthetic choice; it is just a proportional one you should make deliberately.
Aftermarket is stricter still. Eduard’s catalog names the target kit manufacturer for its accessories and states that compatibility with other products is not guaranteed. Scale alone is never enough.
CALLOUT — Measure Your Shelf First
- Find the kit’s assembled length and wingspan on the manufacturer’s page — not the box dimensions.
- Add handling clearance, then verify shelf width, depth, and cabinet-door clearance before ordering. The clearance figure is specific to your furniture. Measure it; don’t guess.
Picking a Subject That Won’t Defeat You
Airframe type translates directly into workload.
- Single-engine monoplanes are the low-risk default. Fewer repeated engines, propellers, nacelles, transparencies, and alignment points than anything else on the shelf.
- Multi-engine bombers multiply nacelle and propeller assemblies, transparencies, and alignment decisions.
- Biplanes add interplane struts and rigging.
- Tricycle-gear jets may need nose ballast, and the requirement is kit-specific — take it from the instructions or a completed build, not from assumption. In his IPMS/USA build of Tamiya’s 1/72 Grumman F-14D Tomcat, item 60795, Tomasz Menert records adding ballast as his own decision.
Screen a subject this way before buying: one engine, monoplane, limited canopy framing, no required rigging, no uncertain ballast, modest external stores, and at least one marking scheme you genuinely like.
Then apply the tie-breaker no spec sheet can settle: pick an aircraft you want to look at for years. The lowest-complexity kit of an airplane you love beats a simple kit of one you don’t.
Brands and Tooling: What a Name on the Box Predicts
Brand identifies the manufacturer, the edition system, and the support channel. The item number and tooling timeline identify the plastic.
Value-led mainstream
Airfix and Revell both publish accessible starter and model-set products. Airfix’s A55001 bundles 26 parts with paint, glue, brush, and decals, and publishes assembled dimensions. Revell’s Level 1 designates a glue-free plug-in system. Included quantities are small, and the inclusion of supplies tells you nothing about long-term finish quality.
Revell item 03838 is the cautionary example in the same aisle: a 2021 product built on earlier tooling.
Engineering-led
Two IPMS/USA full builds support strong engineering claims for two exact Tamiya items. Of the 1/72 F-14D, item 60795, Menert writes: “The fit and engineering is just spectacular.” Of the 1/32 F-51D, item 60328, Brown concludes: “This is a wonderful kit.”
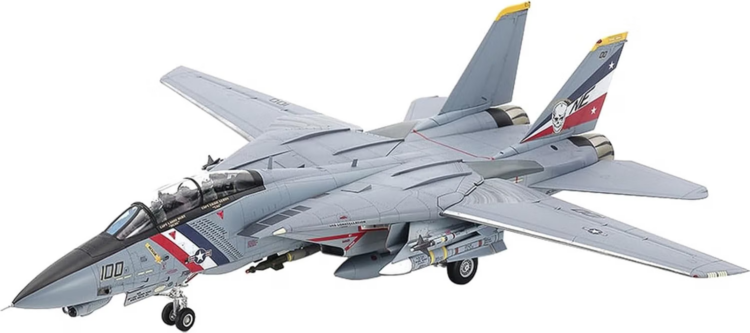
Read the rest of both reviews before you generalize. Menert also reports busy instructions, a drilling step he missed, simplified main gear wells, no interior canopy masks, and a reversed national insignia in one marking option. Brown records difficult seams, a centerline canopy seam, configuration-related compromises, and fit corrections. Precise engineering and a heavy workload are not opposites.
Detail-forward and multimedia
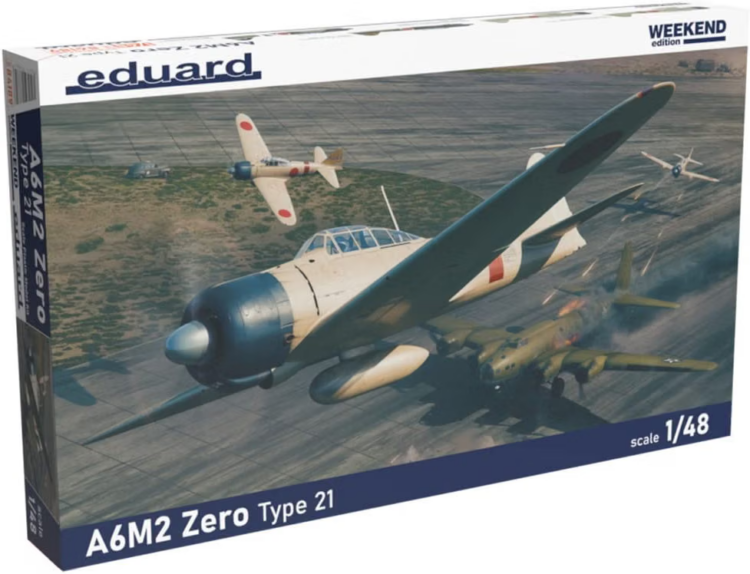
Eduard’s ProfiPACK editions include kit-specific photo-etch, masks, and expanded decal options. Its Weekend Edition A6M2 Zero Type 21, catalog 84189, is plastic with four markings and explicitly no photo-etch, masks, or resin — a useful boundary marker for anyone learning what “multimedia” means. Brassin is Eduard’s resin and printed accessory line, presented separately from its plastic kits, photo-etch, and masks. CMK produces polyurethane, white-metal, and full-resin detail products in 1/72, 1/48, and 1/32.
More detail is worth money only if you want the added process and the detail will still be visible in the display configuration you’ve chosen.
Large-scale ranges
ICM’s 2024 catalog documents 1/32 aircraft including the Hs 123A-1, item 32014, labeled as 100% new molds. Presence in 1/32 does not by itself indicate beginner suitability. Large-scale purchases require the same exact-tooling review, plus stricter shelf and consumables checks.
The rule that outranks brand loyalty
Tooling date beats brand reputation as a screening rule — and build evidence beats tooling date for actual behavior. Work in this order: exact item number → tooling lineage → instruction preview → named full build → current seller terms. Use the item number, because identical subjects in identical scales can exist in several different tools and boxings.
Essential Buying Criteria: What to Prioritize, in Order
Apply these in sequence and stop when a deal-breaker appears. Later extras never compensate for a failure in fit, safety, or size.
1. Fit and engineering
Positive locating features, keyed assemblies, and unambiguous attachment geometry reduce the alignment guesswork a beginner is least equipped to resolve. Poor fit converts directly into filling and sanding. Trust completed builds over in-box impressions here: only a finished model demonstrates whether major joints closed without filler. And note that even a highly praised kit can contain localized problem joints — Menert’s and Brown’s reviews both name theirs.
2. Surface detail — engraved versus raised panel lines
Engraved lines are recessed; raised lines protrude. Neither, on its own, proves accuracy or quality. Identify the surface treatment from sprue photos or a review, then ask a practical question: does the seam work the reviewer describes run across that detail? If sanding is documented near detail you care about, decide up front whether rescribing or replacing it is work you want. Don’t reject a kit on raised lines alone — weigh the subject, the alternative toolings, and the cleanup actually reported.
3. Part count relative to your experience
Use count as a workload proxy, then refine it with the number of steps, the optional configurations, and any non-styrene contents. Low count doesn’t guarantee fit; high count doesn’t guarantee difficulty when the engineering is precise. Scale is no shortcut either — Menert’s 1/72 Tomcat runs to 50 assembly steps across a 24-page manual.
4. Clear parts
Check clarity, seams, fit, and masks — as four separate questions. Brown found a serious center seam on the main canopy of the F-51D, and masks that were printed but not precut. Menert’s Tomcat supplied exterior masks but none for the canopy interior. Included masks are not necessarily precut, and not necessarily provided for both surfaces. A thick or seam-marked canopy is fine if you’re ready to polish it. It is a poor surprise on a build where you planned no corrections.
5. Decals
Register is the alignment among printed colors. Carrier film is the transparent support the markings sit on. Silvering is the whitish look of trapped air beneath that film. Check register, conformance, fragility, and lifting on the exact sheet, via a completed build.
Check volume, too. Menert counts roughly 300 decals across two sheets covering five options on item 60795 — not all of which apply to any one scheme. Confirm the marking option you actually want is on the sheet, with the national insignia and stencils the instructions call for.
6. Instructions and paint callouts
Judge a manual on sequence, variant branches, drilling steps, paint calls, and step density. Both IPMS/USA builds document easy-to-miss details inside manuals they otherwise rate well.
Airfix describes an internal process in which Petts works alongside the kit designer and uses builds to clarify the artwork. Airfix’s account gives his working rule for a crowded diagram as: “if it’s getting a little busy, introduce another step.” Clear artwork still can’t prevent every mistake — pair the manual preview with a review from someone who followed it.
And never treat box art as the paint plan. Use the instruction option, and confirm before purchase that the named paint system is one you can source.
7. Aftermarket and spares support
Aftermarket is exact-fit inventory, not a general benefit. Eduard specifies intended kit manufacturers item by item — photo-etched accessories for the Meteor FR.9 in 1/32, catalog 325005, are specified for Revell; AH-6J guns in 1/48, catalog 481184, for ICM; P-51B seatbelts STEEL in 1/32, catalog 33392, for its own kit. Match scale, aircraft variant, manufacturer, and the exact item where one is named. For spares, manufacturer support may require the exact kit number; Revell routes spare-parts questions through its official service.
CALLOUT — The Five-Minute Pre-Buy Audit
- Verify the exact item number.
- Find the finished dimensions — length and span.
- Read the parts and media list: plastic only, or resin and photo-etch too?
- Check the tooling lineage for that item number.
- Read one completed build of that boxing.
- Confirm the paint and glue required, and what’s included.
- Read the seller terms and return window.
Budget Tiers: What Spending More Actually Buys You
Price does not establish fit or quality. What it reliably signals is inclusions — so compare those, plus the engineering evidence and the breadth of markings, against what you’ll actually use.
- Entry. A simple plastic kit, or a starter/snap package with supplies in the box. Few mandatory techniques, limited options. A low price cannot substitute for tooling and build evidence.
- Mid. A standard glue kit with a sound completed-build record and marking choices you want. Extra options may go unused.
- Premium. Added media, precut masks, broader decals, or complex display configurations. Eduard supplies the cleanest controlled comparison in the category: Weekend catalog 84189 is plastic and four markings, while ProfiPACK editions of the same subject — the A6M2 Zero Type 21 appears as ProfiPACK catalog 82212 — add photo-etch and masks.
Where returns diminish. Spend more only for a documented improvement you will use: better engineering on that exact kit, an included mask, the markings you want, or a detail medium you’ve deliberately chosen to learn. Beyond that, the money does more good as reusable sprue cutters, abrasives, adhesive, paint — or the second kit.
Ownership Costs and Compatibility: What the Box Doesn’t Include
The supporting purchase most first-time buyers underestimate
What you need depends entirely on whether the kit is snap, starter, or standard glue construction. Airfix A55001 includes paints, glue, a brush, and decals. Revell Level 1 is designed without glue at all.
Minimum viable — snap kit: the kit, a safe cleanup tool if one is required, manufacturer-approved paint if you’re finishing it, and a protected work surface.
Minimum viable — glue kit: sprue cutter; a hobby knife with No. 11-style blades, used under appropriate supervision; sanding material; a cement compatible with the plastic; the paint and brushes the instructions name; masking tape; and whatever ventilation the product labels specify.
Comfortable expansion: multiple abrasive grits, filler, primer, decal setting solution, clear coat, dedicated lighting and a holder — and an airbrush only alongside suitable ventilation and the protective equipment the products require.
Buy against the actual instruction sheet and your chosen scheme, not a maximal generic checklist. Most of the tools are reusable, which changes the value math from kit two onward. Blades, abrasives, cement, paint, thinner, masking, and clear coats stay consumable.
Will it work with what you already own?
- Adhesive ↔ material. Plastic solvent cement works on compatible styrene joints. It will not bond resin or brass; those need an adhesive appropriate to the material, and the label tells you which.
- Paint ↔ thinner. Compatibility is product-line-specific. Follow the paint manufacturer’s own directions or an explicit cross-compatibility statement rather than assuming a chemistry label covers every formulation.
- Aftermarket ↔ kit. Scale, variant, manufacturer, and exact tooling where stated. Walk away from an accessory listing that gives only subject and scale when the producer normally specifies a base kit.
- Spray product ↔ room. Ventilation must be adequate to carry vapors away from the work area — at minimum, whatever the product’s own directions call for — plus whatever the label and safety data sheet require. An open window is not automatic proof of adequate control.
Water-soluble paint does not make a boxed set hazard-free. Revell’s Model Set P-51D Mustang, item 64148/9090, includes water-soluble paint and still warns that its solvent-based glue is flammable, may cause drowsiness or dizziness, and requires adult supervision.
How to Weigh the Evidence Behind Any Recommendation
Four kinds of sources, four different jobs:
- Manufacturer copy and box art are strongest for contents, item number, assembled dimensions, edition, warnings, and instructions. They are not independent evidence of fit or value.
- In-box reviews document visible contents and molding quality.
- Full build reviews document fit, instruction use, decal behavior, and real problems — for the sample the reviewer built. IPMS/USA Reviews is the model to look for: named review authors, exact product numbers and scales, contents lists, construction narratives, and conclusions.
- Tooling databases document lineage, not behavior. Aggregated forum sentiment can reveal recurring quality-control patterns worth asking about, but it is vulnerable to pile-on and small samples, and it shouldn’t carry a load-bearing claim by itself.
One build establishes that one named builder encountered something. It cannot quantify how often a problem occurs across a production run.
Pitfalls, Limitations, and Buying Mistakes
Kit-side red flags
A rebox is not automatically a bad kit. It simply disproves the assumption that new packaging means a new mold — which is the assumption most first-time buyers make. Flash, canopy seams, ambiguous steps, and option-dependent compromises become documented problems for a specific boxing only when a completed build reports them; that is exactly why the build review sits ahead of the seller comparison.
Rule a kit out when the build requires a technique you don’t want to learn yet and an alternative tooling of the same subject meets the same need with fewer risks.
Seller-side red flags
The Federal Trade Commission, in its August 26, 2025 consumer alert on social-media ads offering very low prices on well-known brands, advises shoppers to research the seller rather than take an ad at face value. Applied to kits, that means a listing that can’t identify its item number, won’t show the actual box, sprues, clear parts, decals, and instructions, or omits shipping and return terms is a listing you verify before you pay — not one you accuse.
These are risk factors. Bagged, unsealed, “rare,” out-of-production, or no-return listings are not evidence of fraud on their own, and a low price may be legitimate clearance or a private sale. Compare the seller’s photos against the manufacturer item number and known contents; a mismatch justifies questions, and an unanswered question justifies walking.
Self-inflicted mistakes
- Buying aftermarket first. Kit-specific photo-etch or resin bought before the base kit and configuration are settled can be money spent on parts that don’t fit anything you own.
- Buying an airbrush before the first kit is finished. An airbrush can be right from build one if you have the ventilation, budget, training, and a finish that requires it. It is not mandatory by category — A55001 ships with a brush and paint.
- Buying by box art. Verify the item, the tooling, and that the decal sheet actually carries the scheme you pictured.
- Stash inflation. Unbuilt boxes accumulate faster than finished models. Finish or deliberately retire the current project before a new purchase becomes the answer to a process problem.
When to walk away, substitute, or wait
- Walk away when seller legitimacy or terms can’t be verified, when required safety controls aren’t available to you, or when the kit’s finished dimensions exceed your display space.
- Substitute when another exact tooling of the same subject has a better documented fit and workload match, and offers the scheme you want.
- Wait when consumables, supervision, ventilation, or a usable build review are still missing. Scarcity language in a listing is not evidence that buying today is necessary.
A no-buy is a successful outcome when it prevents an unsuitable purchase.
CALLOUT — Warning Signs on a Listing
- No item number given
- No photos of the actual contents
- Seller can’t identify the boxing or tooling
- Decal sheet not shown
- Condition terms unclear
- Implausible discount
- No traceable seller record
- No shipping or return policy
Four Buying Scenarios, Matched to Real Constraints
The complete first-timer. A low-count starter set or a well-reviewed simple glue kit. Airfix A55001 is a defensible space-first example: 26 parts, Skill Level 1, published assembled dimensions of 5.2 by 6.2 in. (13.1 by 15.7 cm), and paint, glue, brush, and decals in the box — on 2020 tooling. It is 1/72 rather than the 1/48 default, which is precisely the point: constraint outranks convention. It is a documented example, not a universal best kit.
The returning builder. Recent tooling plus current build evidence, reviewed before the checkout page. Tamiya item 61119 illustrates the shape of that check: a 2018 new-tool record and a published Detail & Scale review of the 1/48 Spitfire Mk.I. Review what’s changed in decals, paint systems, and included masks since you last built.
Building with a child. A manufacturer-designated glue-free system — Revell’s Level 1 plug-in construction is the clear definition — plus the item’s own age label and warnings, plus an adult supervision plan. An age threshold on a box is not a readiness assessment. The supervising adult still has to judge whether the child can follow the instructions and safely handle any adhesive, sharp point, paint, or small part the product identifies.
The step-up build. Add one intentionally chosen inclusion, not every available medium. A ProfiPACK-style boxing with photo-etch and precut masks is a sensible first step, provided the added detail serves the display configuration you’ve picked and the exact boxing actually includes it. A reasonable progression: unenhanced styrene → masks → a small photo-etch set → resin or full multimedia.
Final Purchase Checklist
Run this immediately before ordering — stock, seller terms, and boxing contents all change.
- Confirm the scale against your measured shelf and the published assembled dimensions. If dimensions aren’t listed, find an official measurement or calculate from the verified full-size figure and the ratio.
- Confirm the tooling generation and branch, not just the box date.
- Confirm part count, step count, optional configurations, and any non-styrene contents against your experience.
- Confirm the paint and thinner system named in the instructions is one you can source.
- Confirm the decal options include the scheme you actually want, and check how that sheet behaved in a full build.
- Confirm masks and detail parts are included or available in an exact-kit-compatible form.
- Confirm seller identity, stated condition, shipping, payment protection, and the return window. If the seller can’t be verified, don’t pay.
- Confirm your consumables, ventilation, protective equipment, and supervision are in place before the kit arrives.
Save the listing, item number, stated condition, photos, shipping promise, and return policy.
Frequently Asked Questions
Q: I’ve never built a model airplane before — should I start with a 1/72 or a 1/48 scale kit?
A: Start with 1/48 if its finished dimensions fit your shelf and larger parts matter to you; choose 1/72 when space or total material use is the stronger constraint.
- For the same aircraft, 1/48 is 1.5 times the length and span of 1/72, and takes about 2.25 times the rectangular footprint.
- Scale alone does not determine ease. Compare the exact kit’s part count, instructions, tooling generation, and a completed build before you decide.
Q: What is the complete list of tools and supplies I need to buy along with my first model airplane kit?
A: Buy only the tools and consumables the exact kit requires — starting with cutters, controlled trimming, abrasives, a compatible adhesive, a way to apply paint, masking, and the safety controls the labels specify.
- Snap kits may need no glue at all; starter sets may already include brush, paint, glue, and decals.
- Glue kits commonly need a sprue cutter, a hobby knife with replacement blades, sanding materials, a compatible cement, paint and brushes, masking tape, and a protected, ventilated work area.
- Add filler, primer, setting solution, clear coat, or airbrush equipment only when the process you’ve chosen actually calls for them.
Q: How can I tell whether a scale model airplane kit is an old tooling before I pay for it?
A: Search the exact manufacturer, aircraft, scale, and item number in a tooling timeline, then distinguish the new tool, new parts, and rebox events.
- Record the item number from the listing.
- Open its tooling timeline and follow the precise branch containing that number.
- Confirm with the instruction scan, sprue images, and a completed build of that boxing.
Q: Should I buy photo-etch and resin detail sets for my first build, or is that a waste of money right now?
A: Skip photo-etch and resin on a first build unless the exact part solves a need you’ve clearly identified and you’re prepared for its adhesive, fitting, and safety demands.
- A detailed plastic boxing can be excellent without any of it — Eduard’s Weekend catalog 84189 ships with four marking options and no photo-etch, masks, or resin.
- Eduard’s accessories name their intended base manufacturer and state that compatibility with others isn’t guaranteed, so a set bought early may not fit the kit you eventually choose.
- A ProfiPACK-style edition is the sensible later step, once the included photo-etch and masks are something you deliberately want.
Q: What’s the actual difference between a snap-together kit and a glue kit, and which one should I get for my kid?
A: A snap or click kit uses mechanical assembly without glue where the manufacturer states it, while a glue kit requires adhesive and everything its safety rules demand — so choose according to the child and your supervision plan.
- Revell defines Level 1 as plug-in assembly without glue, and Level 2 as basic gluing.
- Read the exact item’s warning. Revell’s glue-set warning requires adult supervision and flags solvent content, flammability, vapor, a sharp glue-bottle tip, and an age limit of 8 and up.
- Match the child to the manufacturer’s age and safety directions and to your own judgment about their ability to follow instructions safely.
Q: I found a model airplane kit listed far below the usual price — how do I check whether the seller is legitimate?
A: Treat a steep discount as a reason to verify the seller — not as proof of a bargain, and not as proof of fraud.
- Look the seller up independently and confirm traceable business and contact information, as the FTC advises for low-priced brand-name offers.
- Confirm the exact item number, the stated condition, and actual photos of the box, sprues, decals, and instructions.
- Read the shipping, return, and refund terms, and use a protected payment method.
- Walk away if identity, condition, or terms stay unresolved.

Key Takeaways
- Tooling lineage and one completed build tell you more than a brand name or a box date ever will.
- Choose scale against a measured shelf and the physical part size you want to handle — not against convention.
- Budget for the compatible tools, consumables, and safety controls your exact kit requires; the box rarely covers them.
- Verify the item, condition, seller, and return terms before paying, especially when the price looks unusually low.