Most beginners don’t ruin a paint job because they lack skill — they ruin it with one missed step. Here’s the consistency formula that fixes spitting, tip dry, and orange peel for good.
The Coat That Cracked Everything
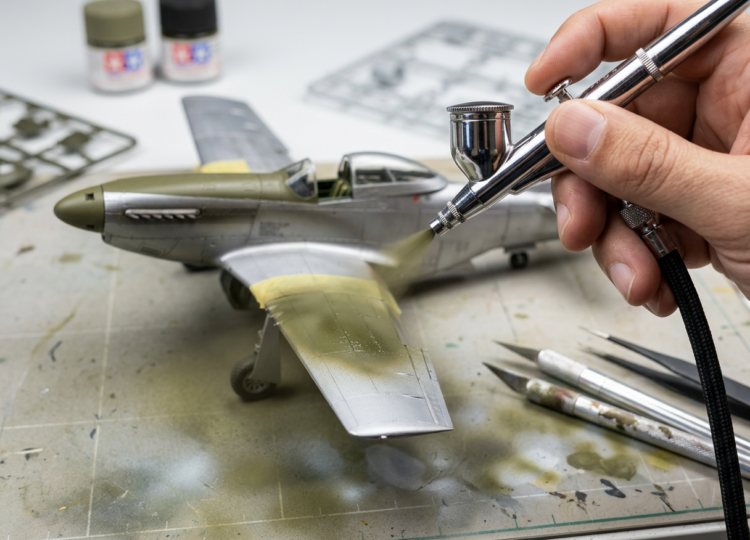
You finally have the airbrush. You’ve watched the videos on trigger control and spray distance. You sit down to lay the first coat of olive drab on your Tamiya 1/48 P-51D Mustang — or any 1/48 aircraft kit — and within two passes the paint spider-webs across the wing, spits dried dots across the canopy, and dries into a rough, sandpapery skin. You did nothing wrong with your hands. You skipped the one step nobody bothered to explain.
That step is thinning. When it comes to airbrushing model airplane kits, paint preparation is the single most-skipped, least-documented part of every beginner tutorial. Equipment guides tell you which airbrush to buy. Technique guides cover distance, arm movement, and trigger work. Then the kit instructions say “thin if necessary” and leave you to guess what that means. The result is predictable: you either spray straight from the bottle (too thick) or add thinner at random until the needle clogs or the model floods.
Here’s the good news. Correct thinning isn’t talent — it’s a repeatable system. This guide gives you a clear, replicable thinning framework across the three paint families you’ll actually use, so your next coat lands smooth the first time.
Why Your Paint Needs to Flow Like Skim Milk
Straight-from-the-bottle acrylic, enamel, or lacquer paint is formulated for brush painting — a method where the bristles mechanically drag paint across the surface and surface tension does the leveling. An airbrush works differently. The paint has to pass through a nozzle orifice typically between 0.2 mm and 0.5 mm in diameter, then get atomized by high-velocity compressed air into a fine mist that lands wet and levels itself out.
Paint that’s too thick can’t atomize at normal hobby pressures of 15–25 PSI. The air can’t break it into fine enough droplets, so you get large, uneven particles and texture problems. Paint that’s correctly thinned flows freely through the needle-nozzle assembly, atomizes into a controlled mist, and arrives wet enough to self-level before the solvent flashes off. As the reference materials put it: “If the tip gets too close to the surface, too much paint will be applied resulting in paint runs. If the tip is too far away, paint particles will dry before hitting the surface of the model resulting in what is commonly called the orange peel effect.”
The benchmark veteran modelers use to judge consistency needs no special equipment — just a stir stick and your eye. The target is skim milk: watery and thin, but visibly opaque. Not whole milk (too cream-heavy), not water (too transparent). As one experienced modeler on the FineScale Modeler forum describes it: “It should look about the consistency of milk. I stir it up with a toothpick and then paint at around 18 psi.”
Sidebar — The 3 Signs Your Paint Is the Wrong Consistency – Too thick: Paint drips in chunks from the stir stick; the spray pattern is coarse and lumpy; tip dry develops within seconds of starting. – Just right: Paint flows in a smooth, unbroken ribbon; the spray is fine and even; the surface self-levels within seconds. – Too thin: Paint pours like water from the stir stick; color is transparent after one coat; paint runs and pools on vertical surfaces.
Acrylics, Enamels, or Lacquers: The Starting Point Changes Everything
Before you reach for any thinner, learn this one rule first: paint chemistry determines thinner chemistry, and the wrong thinner can destroy both your paint mixture and the plastic underneath it. The source materials state it plainly: “There are several different types of paints that are available for scale modeling. The chemical compositions of these paints are very different and they cannot be mixed… As a rule I use the paint manufacturers thinner or an alternate thinner that they recommend. Enamel thinners are used for enamel paints, lacquer thinner is used for lacquer paints, water-based thinners for acrylics.” Hobby educator Sunward Hobbies confirms the same instinct: “Generally, stick to the same thinner from brand name of the paint you are using.”
Three families cover almost everything on a U.S. workbench:
- Water-based acrylics — Tamiya (X/XF series), Vallejo Model Air, Vallejo Model Color, Testors Model Master Acryl, AK Interactive Real Colors. A nuance worth knowing: Tamiya acrylics are technically alcohol-based acrylics carried by propanol, which is why they respond better to Tamiya’s X-20A thinner or isopropyl alcohol than to plain water. Vallejo Model Air and Model Color are true water-based paints that thin with water, Vallejo Airbrush Thinner, and Flow Improver.
- Traditional enamels — Humbrol, Testors, Tamiya Enamel. These oil-based paints have been the backbone of scale modeling since the 1950s. They flow well and self-level beautifully, but they dry slowly. Thin them with Humbrol Enamel Thinner, Tamiya Enamel Thinner, or odorless mineral spirits — never with lacquer thinner, whose aggressive solvents react unpredictably with enamel binders.
- Lacquers — Mr. Color/Gunze Sangyo, Tamiya Lacquer (orange-cap), Alclad II, SMS. These dry by solvent evaporation, atomize superbly, and cure rock-hard. Thin them with Mr. Color Leveling Thinner, Mr. Color Thinner, or Tamiya Lacquer Thinner.
Warning: Lacquer solvents will chemically attack — craze, melt, or deform — raw polystyrene kit parts if applied heavily or directly. As one technical reference explains, “The truth lies in the chemistry of polystyrene. Different manufacturers use varying grades of High-Impact Polystyrene (HIPS), some blended with additives like styrene-butadiene to improve impact strength, which in turn alters their chemical resistance.” The fix is to lay lacquers down in thin mist coats first, letting each flash off before you build coverage.
| Paint Family | Representative Brands | Recommended Thinner(s) | Starting PSI | Notes |
| Water-based acrylic | Tamiya XF/X; Vallejo Model Air; Vallejo Model Color | Tamiya X-20A; isopropyl alcohol (70%+); Vallejo Airbrush Thinner; distilled water (Vallejo only) | 15–20 PSI | Add Vallejo Flow Improver for tip-dry prevention; never use IPA above 70% with Vallejo |
| Traditional enamel | Humbrol; Testors enamel; Tamiya enamel | Humbrol Enamel Thinner; Tamiya Enamel Thinner; odorless mineral spirits | 15–20 PSI | Warm paint before use for better flow; never use lacquer thinners with enamel |
| Lacquer | Mr. Color/Gunze; Tamiya Lacquer; Alclad II | Mr. Color Leveling Thinner; Mr. Color Thinner; Tamiya Lacquer Thinner | 15–20 PSI | Apply in thin mist coats first to protect polystyrene; lacquer thinners will craze raw plastic |
The Exact Ratios That Work — Paint Family by Paint Family
This is the part nobody hands you. Follow these five steps and you’ll mix a sprayable, repeatable batch every time. Treat the ratios as starting points, not gospel — every paint, climate, and nozzle behaves a little differently.
- Gather your materials. You need: your paint (agitated — see below); the correct thinner for your paint family; a clean small mixing jar or palette well; a pipette or dropper for precision measurement; a clean stir stick (a toothpick, wood skewer, or metal mixing rod); and a scrap of styrene sheet or the back of a sprue for testing. The pipette is the most valuable precision tool a beginner can buy for under five dollars — eyeballing thinner from the bottle is the number-one source of session-to-session inconsistency. Before you measure anything, mix the paint thoroughly: “Since paint pigments tend to settle onto the bottom of the original bottle over a period of time, it is important to mix the paint thoroughly before each use… An easy solution is to drop a few copper coated BBs into the paint and shake it for a few minutes.” As a general guideline, the source materials note that “Most paints should be thinned by 25 percent (1/4) to 33 percent (1/3) by volume of paint.”
- Set your starting ratio by paint family.
- Water-based acrylics (Tamiya X/XF, Vallejo Model Air): Start at 1:1 paint-to-thinner by volume. This is the most consistently recommended baseline for Tamiya acrylics with dedicated thinner. Some modelers go thinner — 1:2 or even 1:3 for specialty work like pre-shading filters — but 1:1 is right for standard base coating. Vallejo Model Air, already formulated for airbrush use, needs even less: a 1:1 mix with Vallejo Airbrush Thinner, or as little as 5–10% added thinner, is plenty.
- Traditional enamels (Humbrol, Testors): Start at 2:1 paint-to-thinner by volume. Enamels flow better than acrylics and need less solvent. This is the Humbrol manufacturer spec: “The usual thinning ratio is 2 parts paint to 1 part Humbrol Enamel Thinner.” Gloss enamels may want a touch more thinner than matte variants, and older paint may need closer to 1:1.
- Lacquers (Mr. Color, Tamiya Lacquer): Start at 1:1 (equal thinner to paint) as a safe minimum, and expect to push toward 1.5:1 or 2:1 thinner-to-paint for smooth base coating. Lacquers thin dramatically and want it: “Mr. color lacquers love to be thinned a lot, around 1 part paint to 1.5 parts thinner, otherwise they dry in the air before they hit the model’s surface.” Over-thinning a lacquer makes it transparent — less catastrophic than under-thinning, which clogs and orange-peels.
- Run the skim milk consistency test. Stir the mixture thoroughly for 15–20 seconds. Lift the stir stick out and hold it horizontally. Watch the paint drip from the tip: it should fall in a smooth, thin, continuous ribbon — not chunk off in thick drops, and not pour off like clear water. Visually, it should look like skim milk: thin and watery, but opaque. If it beads up or drips in chunks, add thinner in 3–5 drop increments, stir, and retest. If it runs off instantly like water, add 2–3 drops of paint, stir, and retest. The source rule is simple: “Test the thinned paint with the airbrush and then add additional thinner if necessary a few drops at a time.”
- Test-spray on scrap styrene. Never point a fresh mix at the model first. Lay a pass on a styrene off-cut or the back of a sprue frame. The test pass reveals whether the pattern is fine and even (correct) or coarse and lumpy (too thick), whether the paint is running (too thin), whether tip dry is forming in the first few seconds (too thick or wrong thinner), and what the dried texture looks like at your planned distance and PSI. Adjust thinner or pressure in small increments — change only one variable at a time.
- Adjust for your environment. Conditions matter, and they vary wildly across U.S. climate zones. High humidity above 70% slows acrylic drying and, in extremes, can make clear coats blush; work in air conditioning and use a retarder sparingly. In the arid Southwest, dry air below 30% humidity speeds evaporation and invites tip dry — add a few drops of flow improver and keep sessions short. In the humid Southeast, run the AC and avoid lacquer clear coats on damp days. In the northern states in winter, indoor heating can drop humidity below 20%, so a small humidifier or a touch of retarder helps. Temperature counts too: the source materials warn that “if the plastic is cold, the paint including any primers may not adhere properly.” Aim for 65–80°F (18–27°C).
When Things Go Wrong: Fix It Before It Ruins the Kit
Even a careful mix can misbehave. Here are the four failures you’ll meet most often and how to recover.
| Problem | Primary Cause | Quick Fix |
| Tip dry / spatter dots | Paint too thick; wrong thinner; thinner evaporating too fast | Add 1–2 drops of the correct thinner and retest; reduce air pressure by 2–3 PSI; wipe the needle tip between passes with a cotton swab dampened in thinner; for chronic cases add flow improver or retarder. “Airbrush tip dry is when paint accumulates and builds up on the tip of your airbrush needle, due to it partially drying while being atomised in the airflow.” As Airbrush Modeler notes, “Using paint retarder will slow the drying time of the paint making it much less likely that you’ll experience tip dry problems.” |
| Orange-peel texture | Paint too thick; PSI too high; spray distance too great | Thin further in 10–15% increments and retest; drop PSI to 15–18 for panel work; move the airbrush closer — 6–8 inches (15–20 cm) for scale aircraft panels. If it has already dried, cure 8–24 hours, sand lightly with 1500–2000 grit wet/dry paper, clean, and recoat. For lacquers only, mist pure leveling thinner over a still-wet orange-peel surface to reactivate and re-level it. The reference adds that “the orange peel effect can also be caused by bad thinner, or the wrong thinner, old paint, painting in a high humidity environment above 55–60 percent or airbrushing with higher than normal pressure air.” |
| Flooding / runs | Paint over-thinned; trigger pulled back too far | Let it dry completely — never wipe wet paint off a model. Once dry, sand lightly with 1500-grit wet/dry paper on a small block, dust off, and reapply after adding 2–3 drops of paint to thicken the mix. Adjust your trigger to deposit less per pass: “Runs and sags can be sanded away when the paint is thoroughly dry… The answer to runs and sags is not to put on too much paint in one coat. Many light coats are better than a single heavy one.” |
| Color shift / transparency | Over-thinning reduces pigment density (common with Tamiya and Mr. Color) | Apply a second coat after full cure — acrylics minimum 30 minutes, lacquers minimum 2 hours, enamels minimum 4 hours. For severe transparency, add 2–3 drops of paint to the cup to boost pigment density. With Tamiya acrylics especially, coverage improves dramatically on the second thin coat, so resist the urge to lay it on heavy in one pass. |
Pro Shortcuts That Beginners Never Hear About
- Pre-thin Tamiya acrylics when you open the bottle. The source materials suggest a proactive habit: “to preserve the paint that remained in the paint manufacturers jar, add a drop or two of thinner to it and shake it up.” Extending that, many modelers pre-thin Tamiya by 10–15% the moment a bottle is opened, so it sits at an airbrush-friendly consistency. Only do this if you’ll use the paint regularly — pre-thinned paint has a shorter shelf life. Label the bottle with the date and thinner.
- Use pipette droppers for ratio precision. Pouring thinner by eye is the single biggest source of inconsistency. An affordable set of plastic pipettes lets you measure by drop count, making every batch reproducible.
- Handle Vallejo Model Air differently. It arrives close to spray-ready and needs as little as 5–15% thinner, best with Vallejo Airbrush Thinner or distilled water. Never thin Vallejo with isopropyl alcohol above 70% — it separates the binder from the pigment and curdles the paint.
- Warm enamel paint before thinning. Per the source: “If you are using enamel paint I recommend that you warm the paint before you use it. Warm paint will flow, spray and adhere to a surface much better than cold paint. To warm the paint, use a coffee cup warmer plate… be sure to loosen the jar’s cap so that as the paint warms up and expands it will not pressurize the air in the jar.” Warming naturally lowers viscosity and improves pigment suspension.
- Roll metallic paint jars before opening. Rolling the jar between your palms for 30 seconds warms the paint slightly and starts resuspending heavy metallic pigments — aluminum, steel, chrome — that settle fast. It’s gentler than shaking and introduces fewer air bubbles.
- Keep a thinner log at the bench. A small notepad recording brand, color, thinner, ratio, PSI, nozzle diameter, result, and humidity turns guesswork into a personal formula. A single line — “Mr. Color 70 Dark Green: 8 drops paint, 10 drops Mr. Leveling Thinner, good at 17 PSI through 0.3 mm nozzle” — saves you a dozen ruined coats on the next build.
Your Airbrush Thinning Questions, Answered
How do I step-by-step thin Tamiya acrylic paint for airbrushing model airplane kits?
Thin Tamiya acrylics at a 1:1 starting ratio with Tamiya X-20A thinner or 70% isopropyl alcohol, then adjust to a skim-milk consistency and spray at 15–20 PSI. 1. Agitate the paint thoroughly — drop copper BBs in the bottle or shake for two minutes. 2. Pour paint into a clean airbrush jar, measuring with a pipette. 3. Add Tamiya X-20A or 70% isopropyl alcohol at 1:1 (equal parts) to start. 4. Stir for 15–20 seconds. 5. Run the skim milk test — lift the stir stick and watch for a smooth ribbon. 6. Test-spray on scrap styrene at 15–20 PSI and adjust in 2–3 drop increments. As Airbrush Modeler advises, “Typically I’d thin Tamiya acrylics with the purpose made Tamiya acrylic thinner X20-A to a ratio of around one part paint to one part thinner (1:1), and airbrush the paint at around 18 PSI.”
What is the exact thinning ratio for Mr. Color lacquer paint when airbrushing 1/48 scale aircraft?
Thin Mr. Color lacquer at 1:1 as a minimum and push to 1:1.5 or 1:2 (paint-to-thinner) for smooth base coats, using Mr. Color Leveling Thinner at 15–18 PSI. – Starting ratio: 1:1 paint-to-thinner (Mr. Color Leveling Thinner preferred). – Preferred for smooth base coating: 1:1.5 to 1:2 (paint:thinner). – Use Mr. Color Leveling Thinner over standard thinner — its built-in retarder extends self-leveling time. – PSI: 15–18 for base coating; 10–12 for detail work. As the FineScale Modeler forum puts it, “Mr. color lacquers love to be thinned a lot, around 1 part paint to 1.5 parts thinner, otherwise they dry in the air before they hit the model’s surface.”
Why does my airbrush spit and spatter when I try to paint my model airplane kit, and how do I fix it?
Airbrush spitting and spatter almost always come from paint that’s too thick or from tip dry — dried paint building up on the needle tip — and both are fixed by correcting your thinning. – Add 1–2 drops of the correct thinner and retest. – Wipe the needle tip with a cotton swab dampened in thinner between passes. – Reduce PSI by 2–3 points and add a flow improver to slow tip evaporation. As Airbrush Modeler explains, “Airbrush tip dry is when paint accumulates and builds up on the tip of your airbrush needle, due to it partially drying while being atomised in the airflow.”
What thinner should I use with Vallejo Model Air when airbrushing scale model aircraft?
Use Vallejo Airbrush Thinner with Vallejo Model Air, or small additions of distilled water or Vallejo Flow Improver — and never isopropyl alcohol above 70%. – Best: Vallejo Airbrush Thinner (designed for Model Air and Model Color). – Also fine: distilled water in small additions (5–15%) and Vallejo Flow Improver to reduce tip dry. – Avoid: isopropyl alcohol above 70% (causes binder separation), lacquer thinners, and mineral spirits or enamel thinners (all chemically incompatible). One FineScale Modeler contributor reports: “Model Air ~1 to 1: I have stopped using airbrush thinner and now use Vallejo Flow Improver for thinning. I never get dry tip.”
How do I know when my airbrush paint is thinned correctly before I spray my model airplane kit?
Your paint is correctly thinned when it has the consistency of skim milk — thin and opaque — and drips off a stir stick in a smooth, unbroken ribbon. 1. Stir-stick ribbon test: lift the stick; the paint should fall in a smooth, thin, unbroken ribbon. 2. Shot-glass wall test: tilt a clear jar; correctly thinned paint leaves a thin, translucent, even film with smooth flow-back. 3. Drip-speed test: paint should drip steadily — not chunky (too thick), not instant pour (too thin). 4. Test-spray on scrap styrene at normal PSI: correct consistency gives a fine, even mist with no lumps or spatter.

Key Takeaways
- Thinning ratios vary by paint family: acrylics start at 1:1, enamels at 2:1, lacquers at 1:1 or thinner — each with a chemically compatible thinner.
- The universal consistency benchmark is skim-milk texture: a smooth, thin, opaque ribbon off the stir stick — not cream, not water.
- Always test-spray on scrap styrene before touching the actual kit.
- The three core failure modes — tip dry, orange peel, and flooding — are all correctable with incremental thinner adjustments.
- Environmental conditions like humidity and temperature affect thinning needs and should factor into every session.